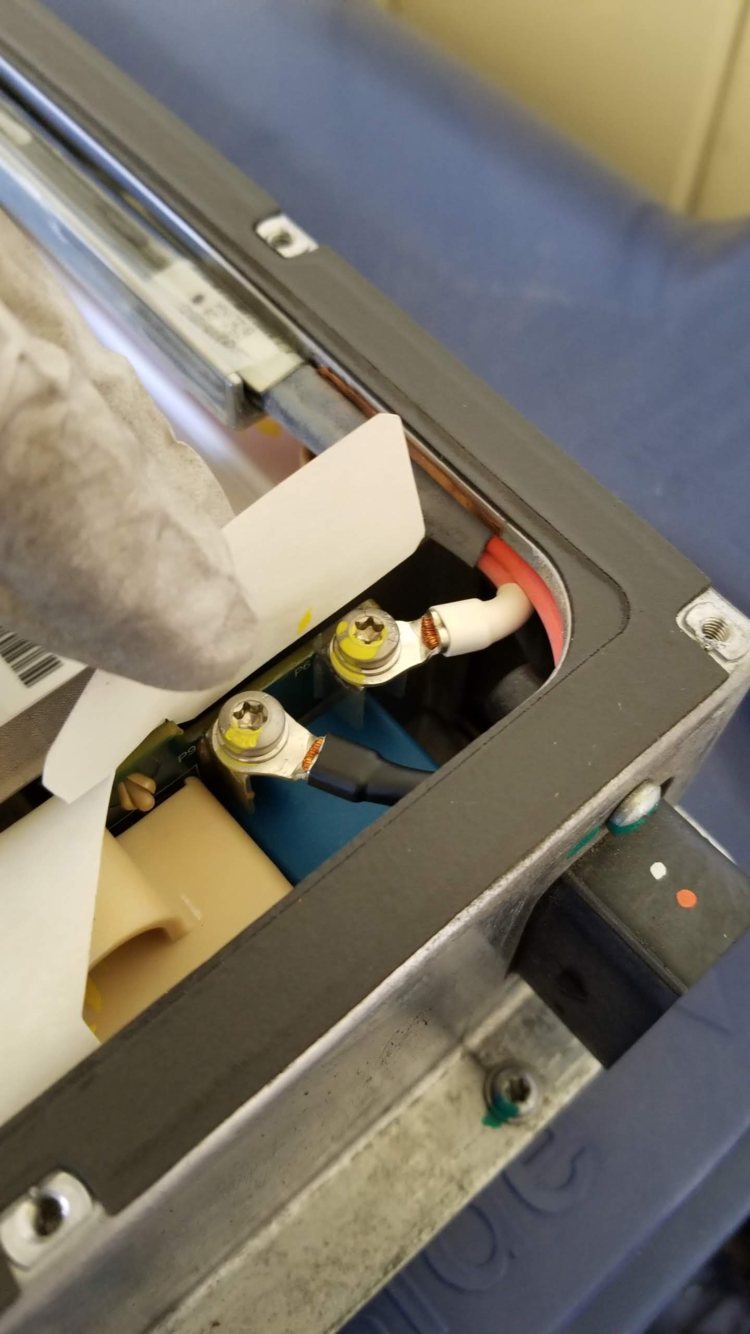
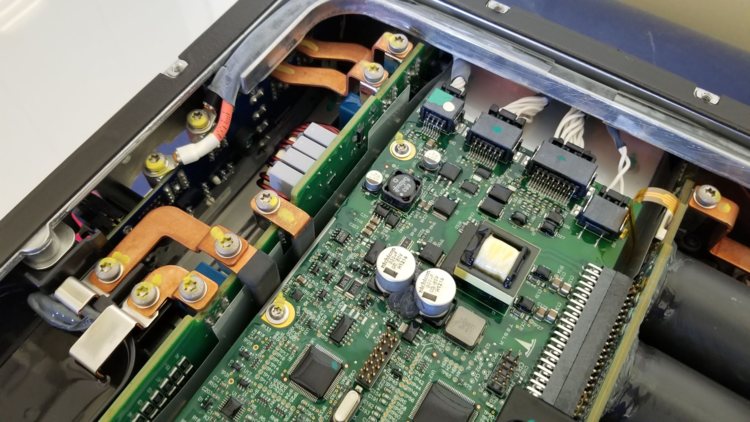
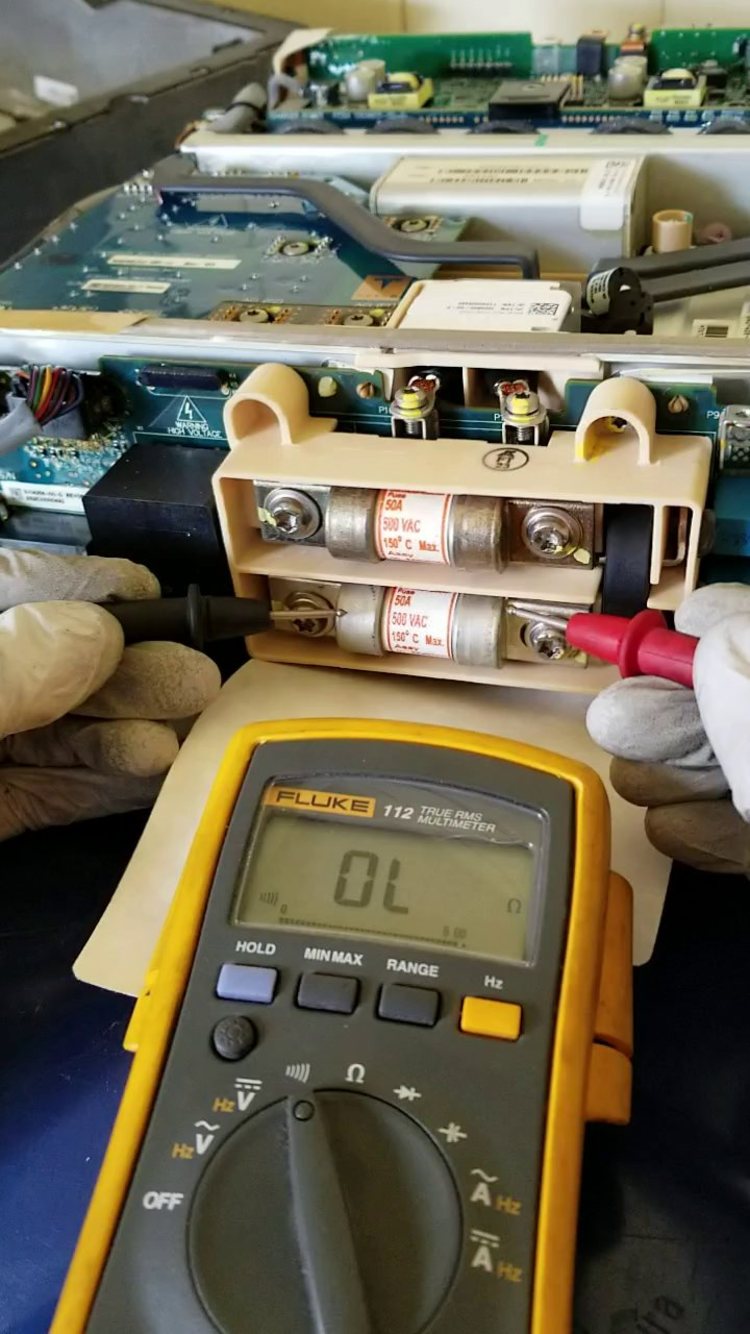
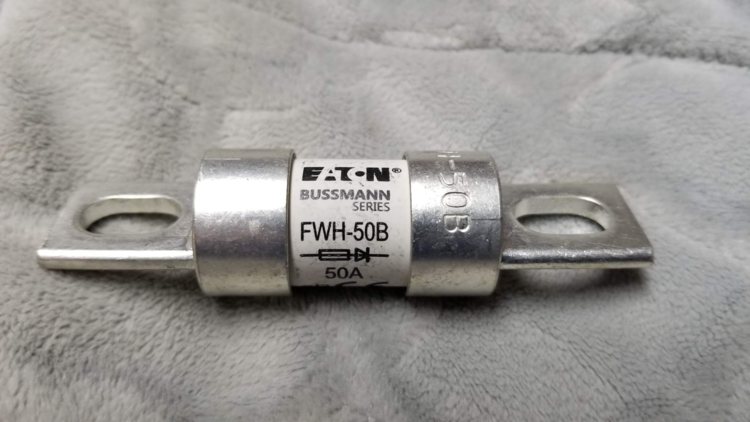
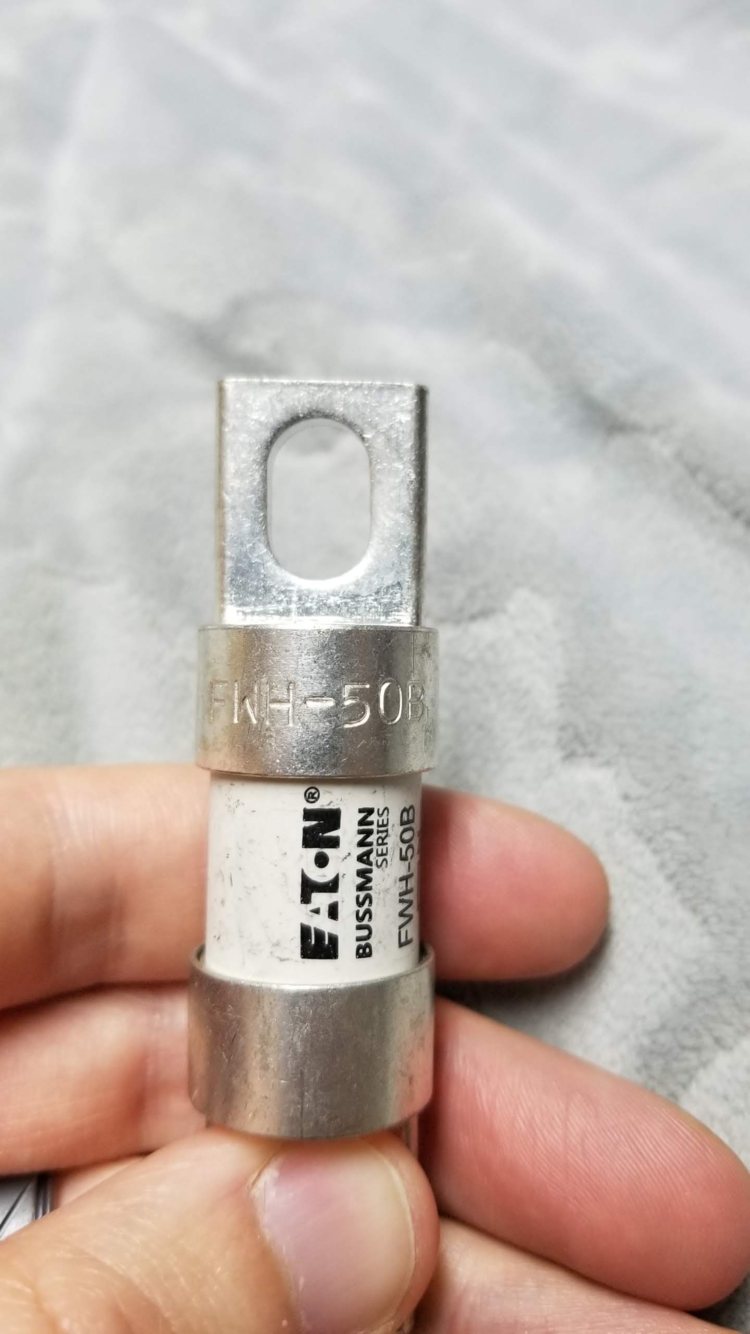
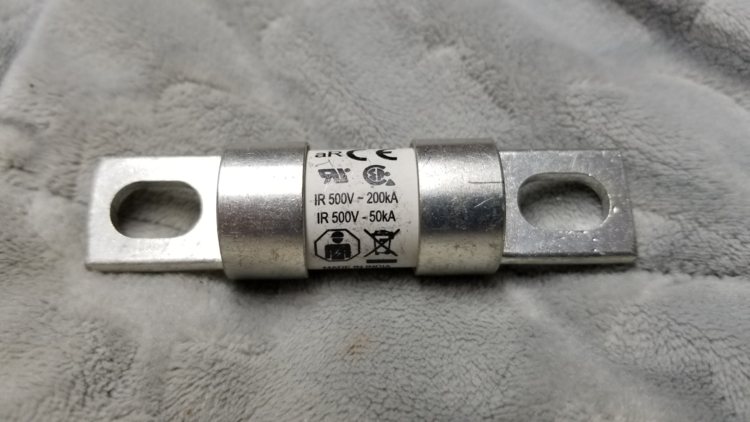
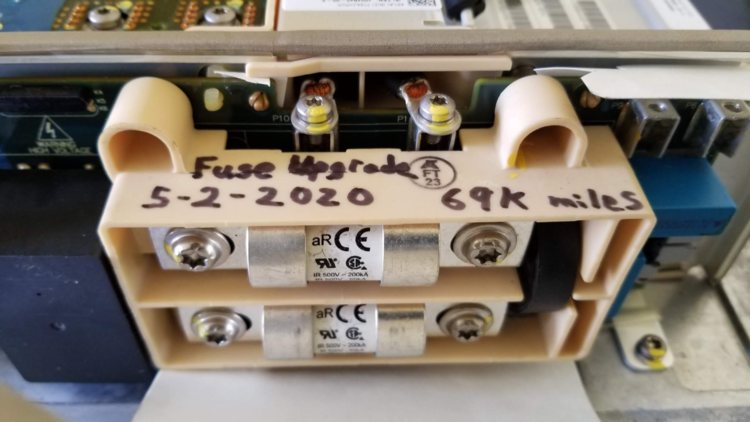
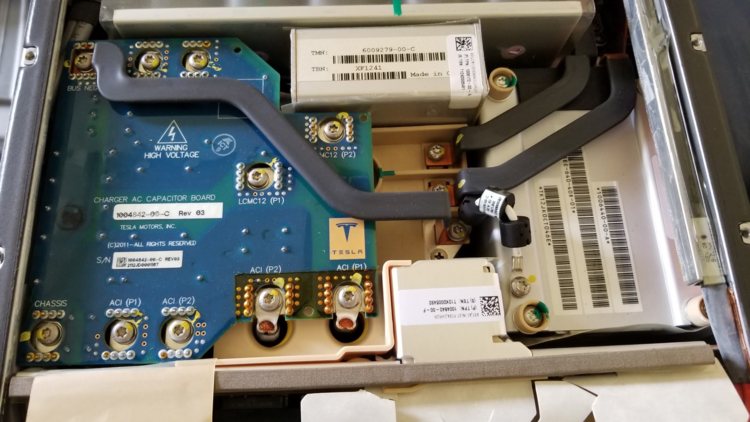
Pictures from my onboard charger fuse replacement

Toyota Rav4 EV Forum

Help Support Toyota Rav4 EV Forum:

This site may earn a commission from merchant affiliate links, including eBay, Amazon, and others.

Tech26

Active member
Joined
Dec 25, 2016
Messages
40
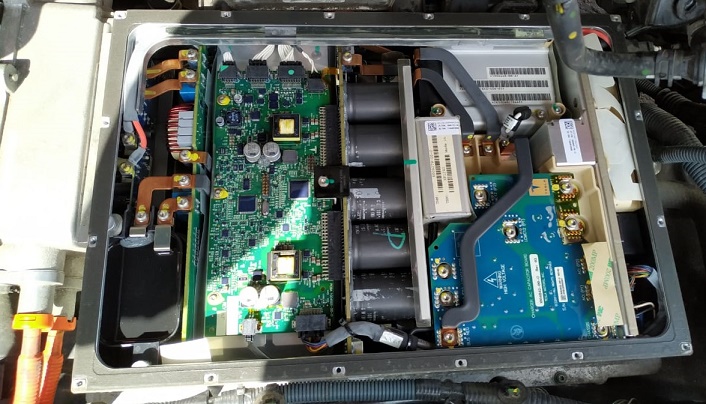
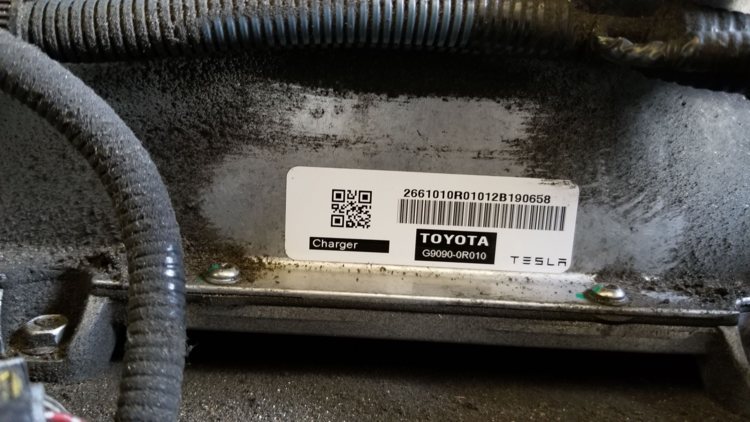
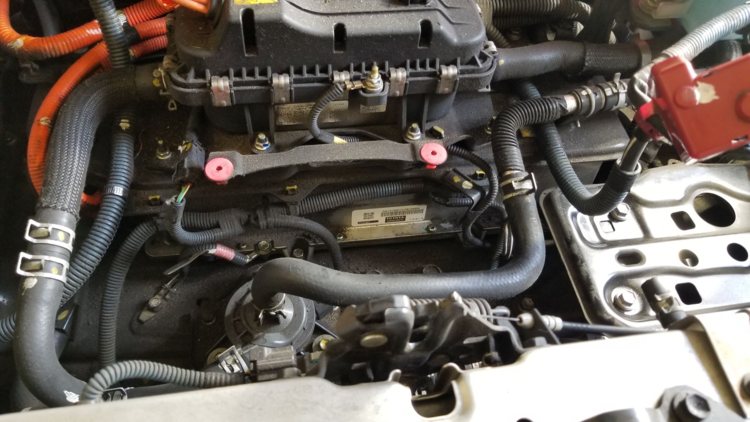
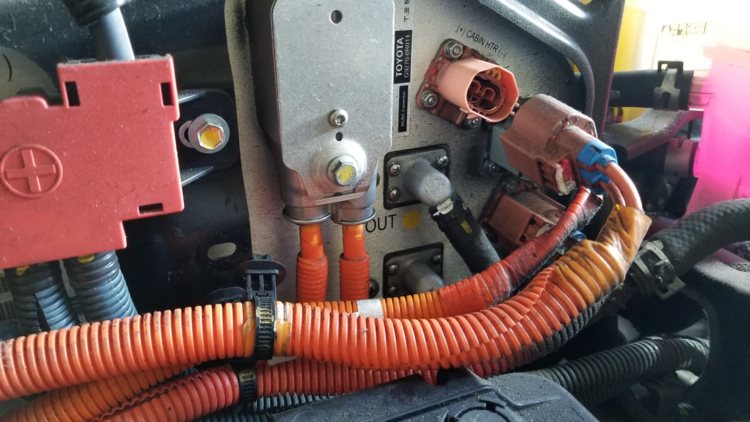
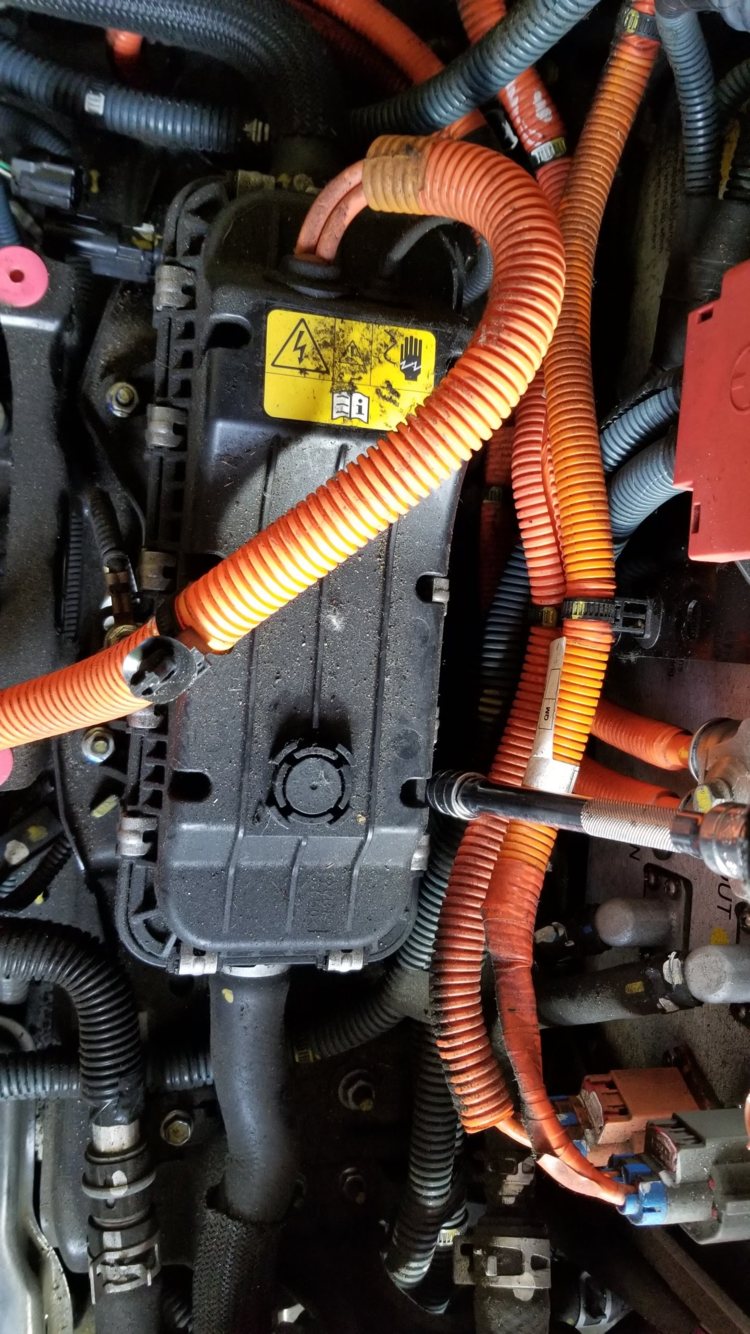
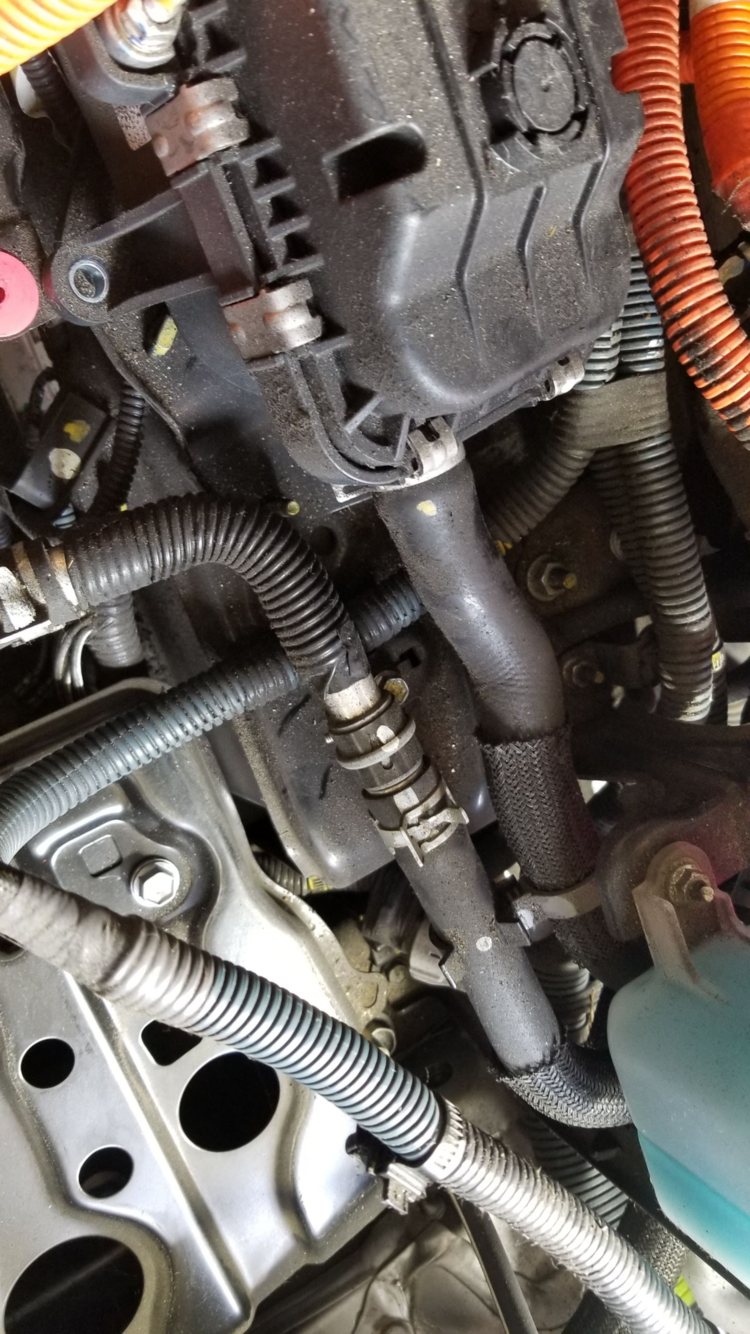
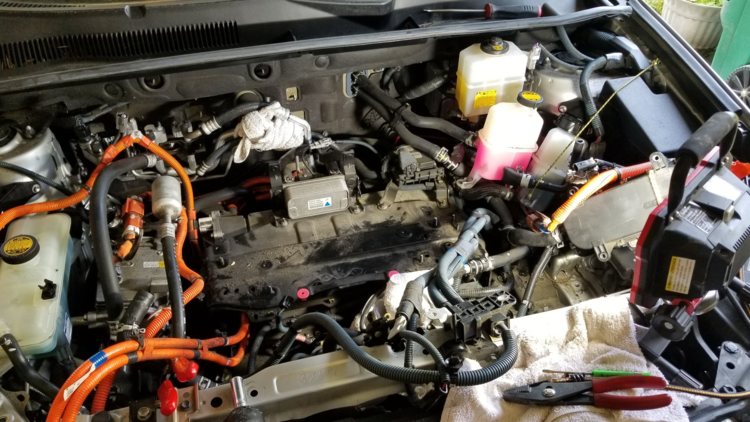
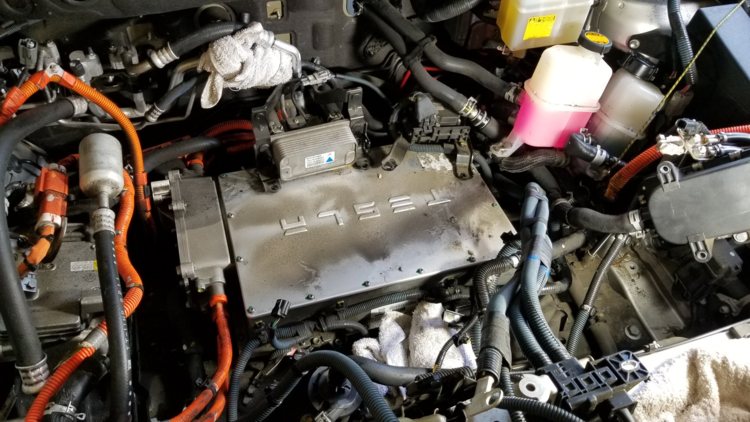
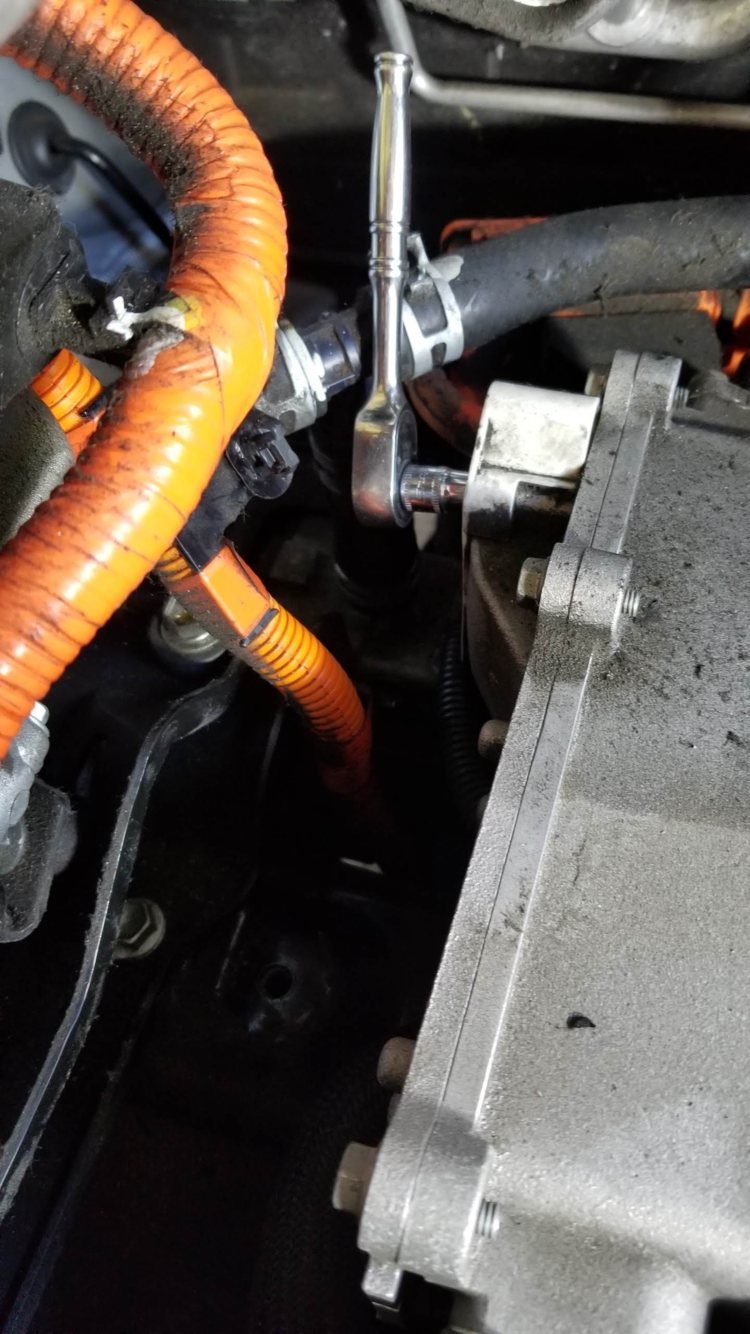
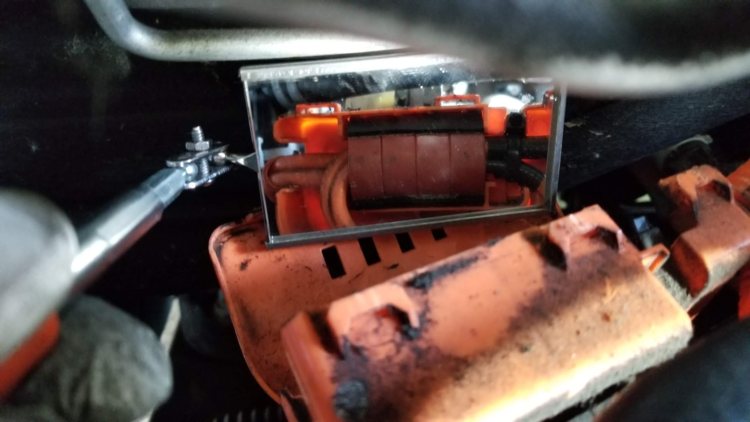
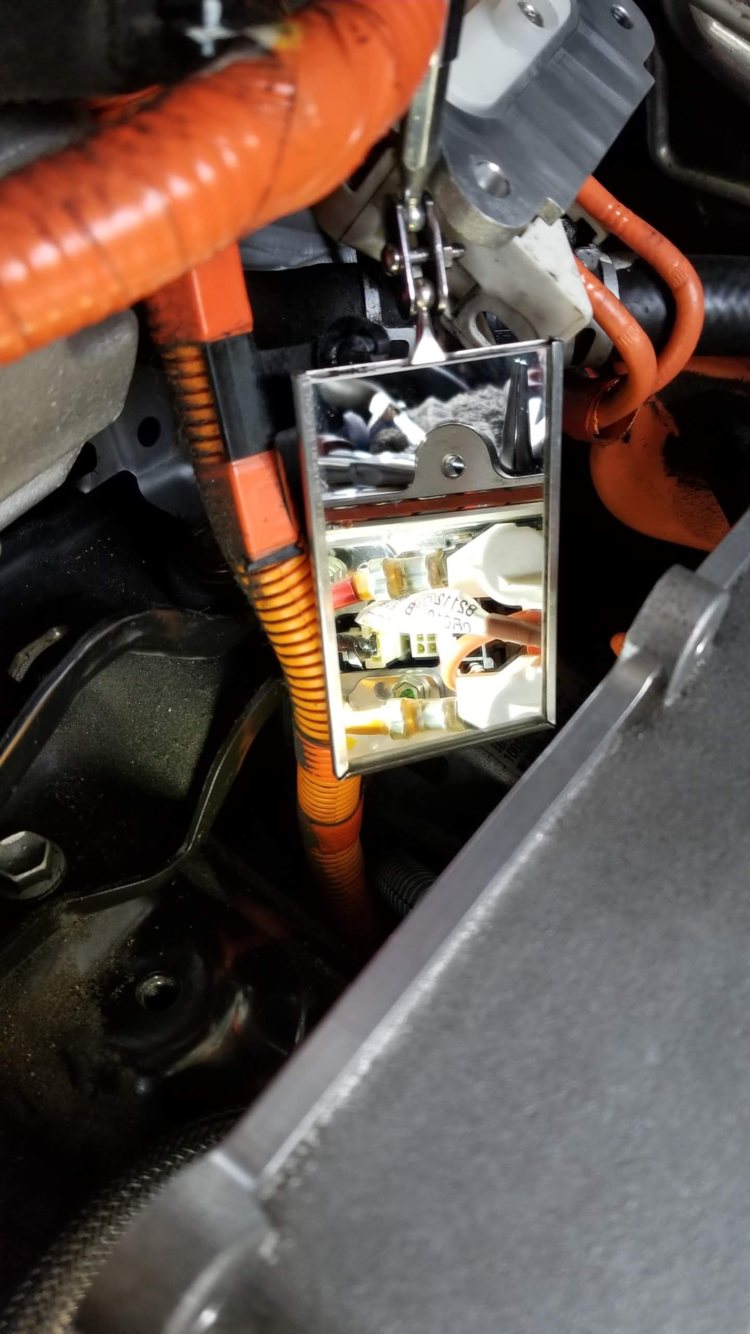
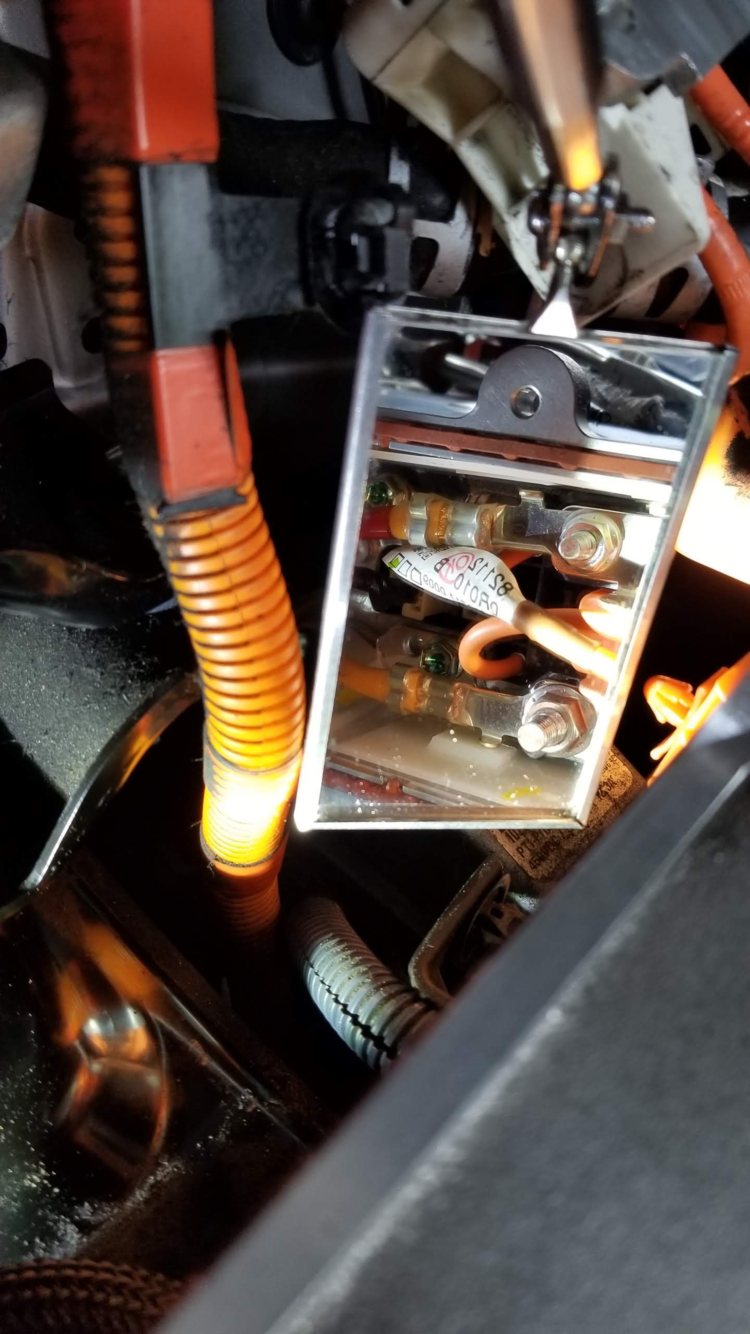
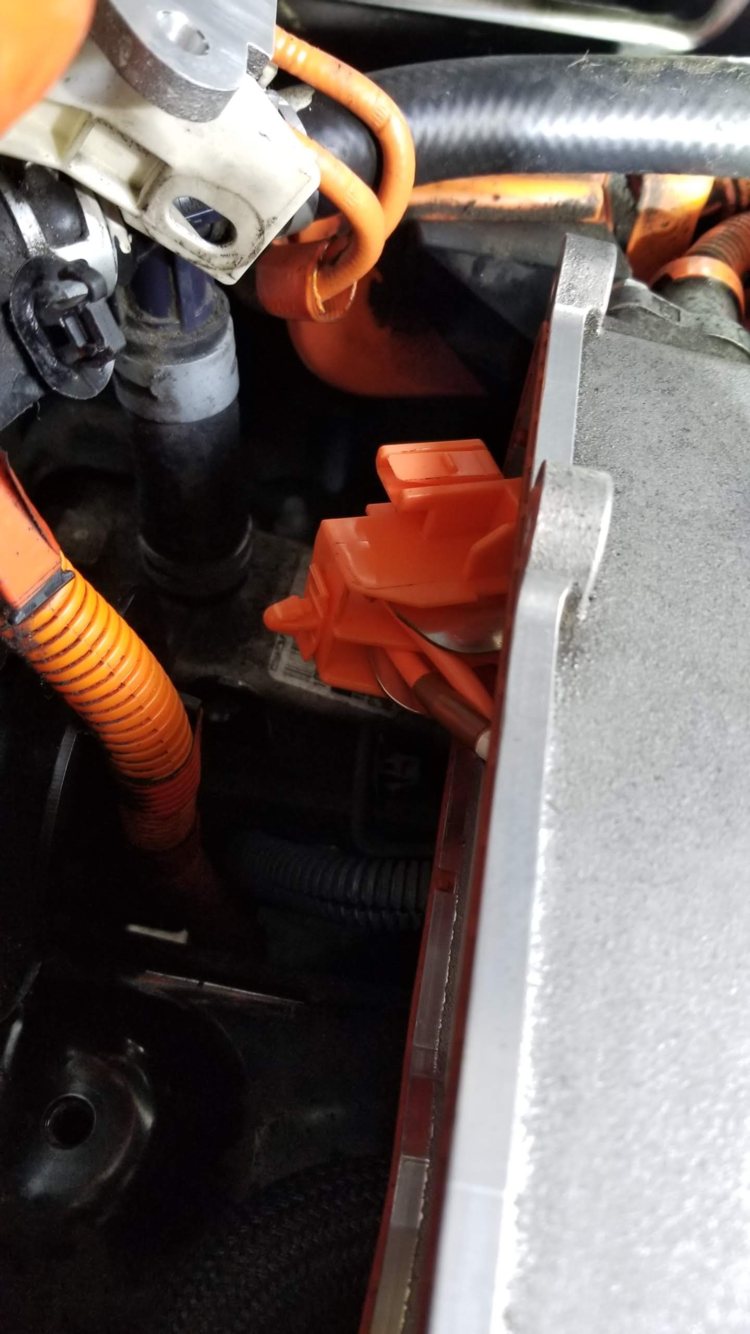
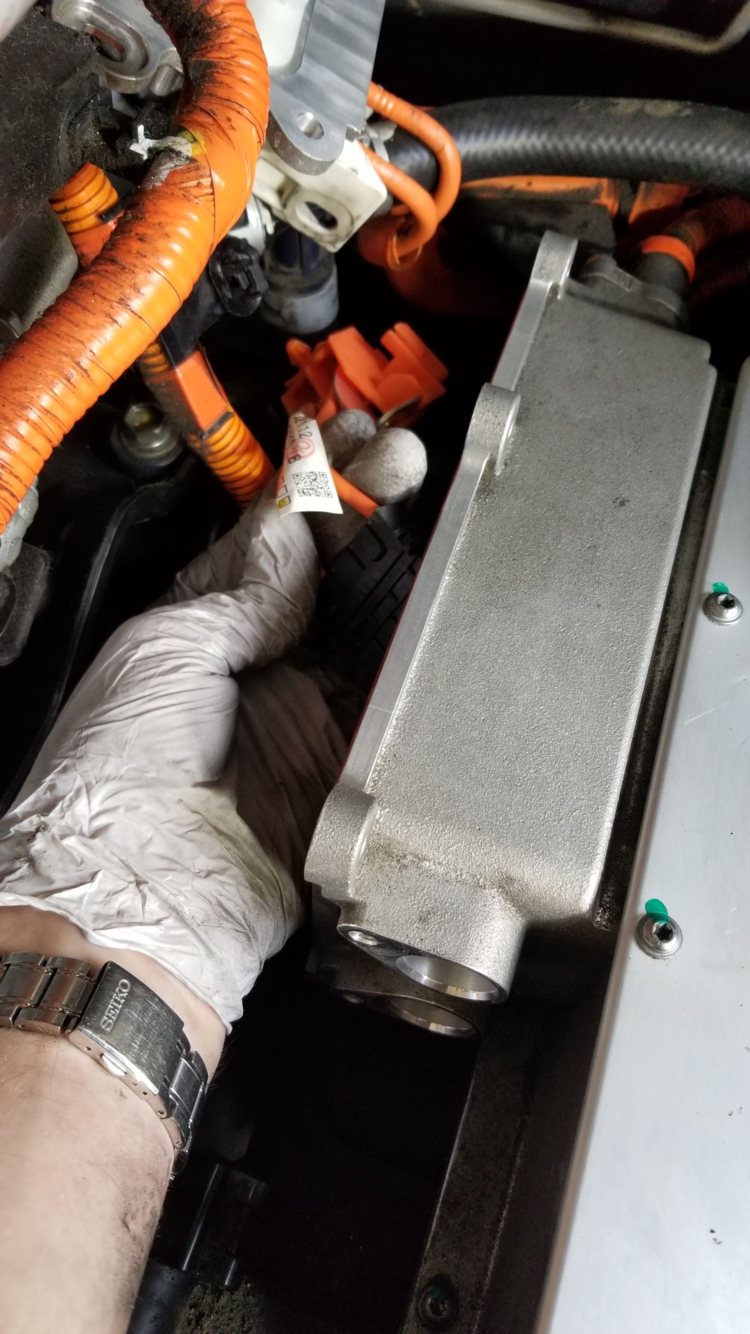
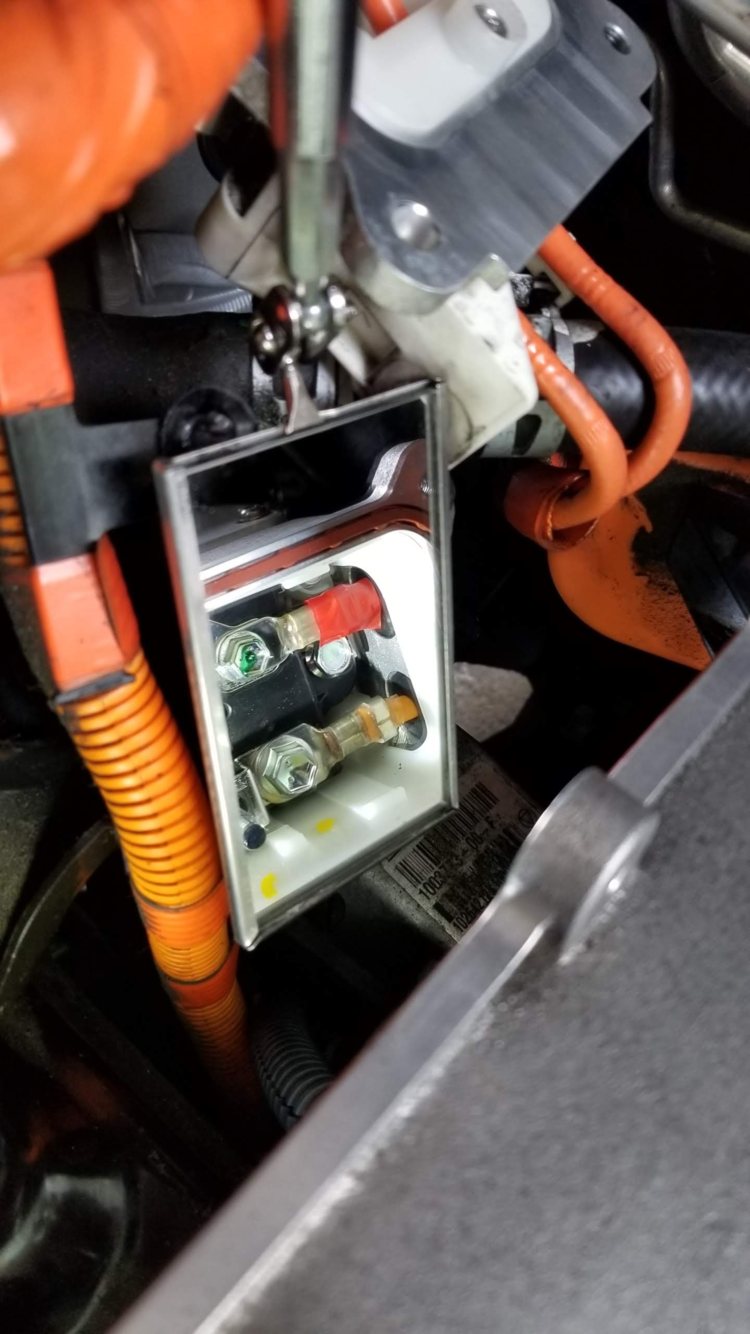
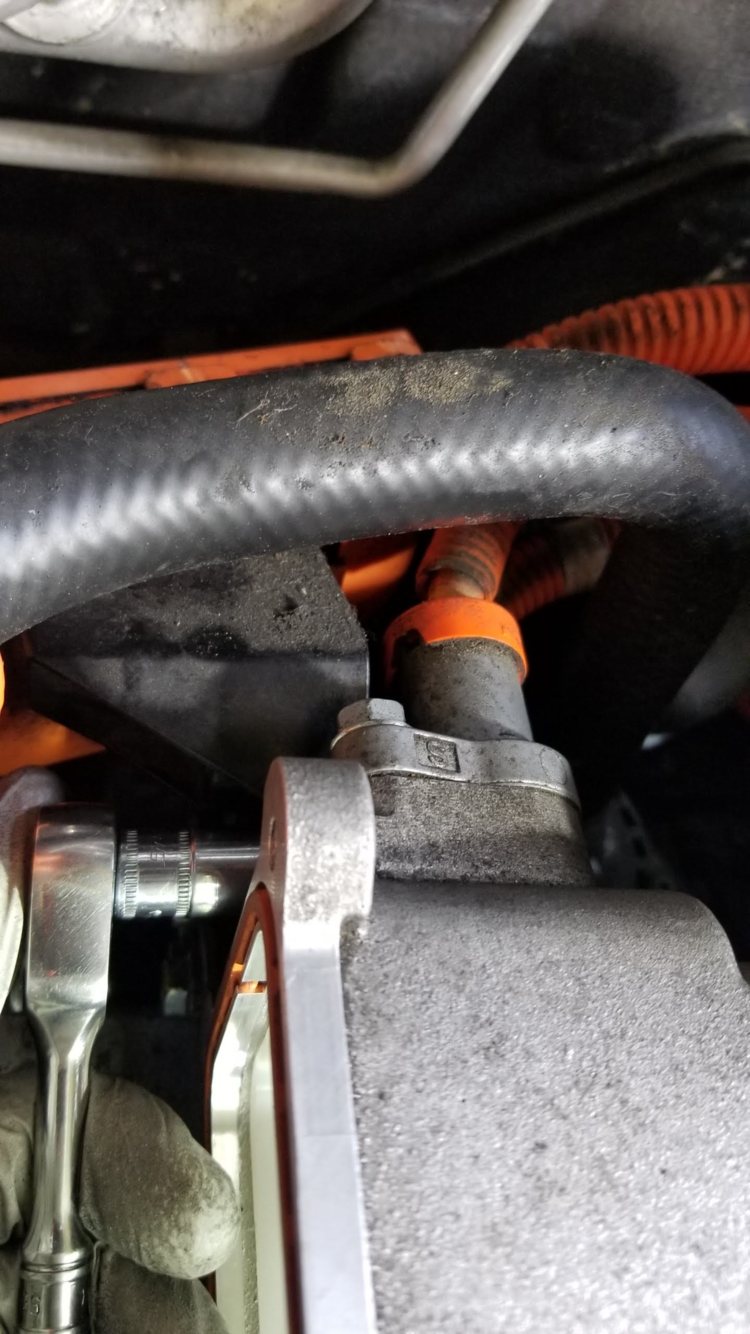
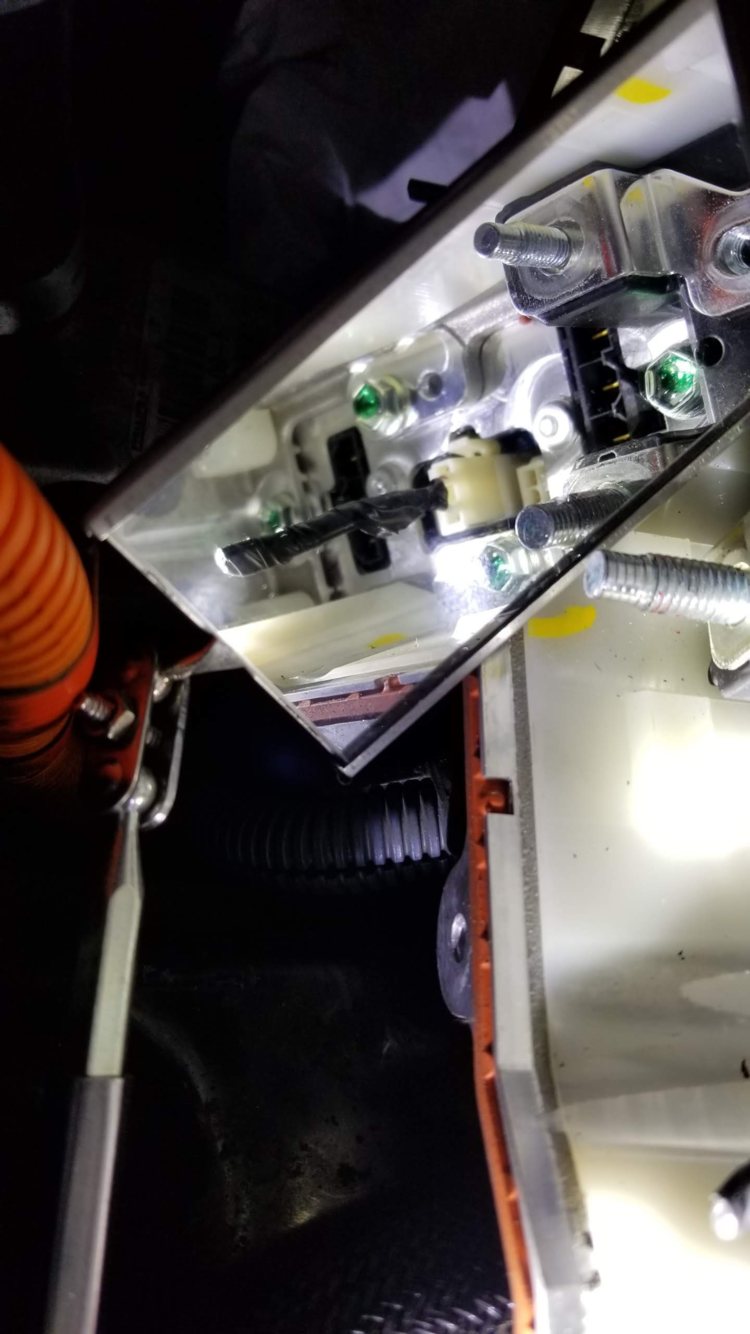
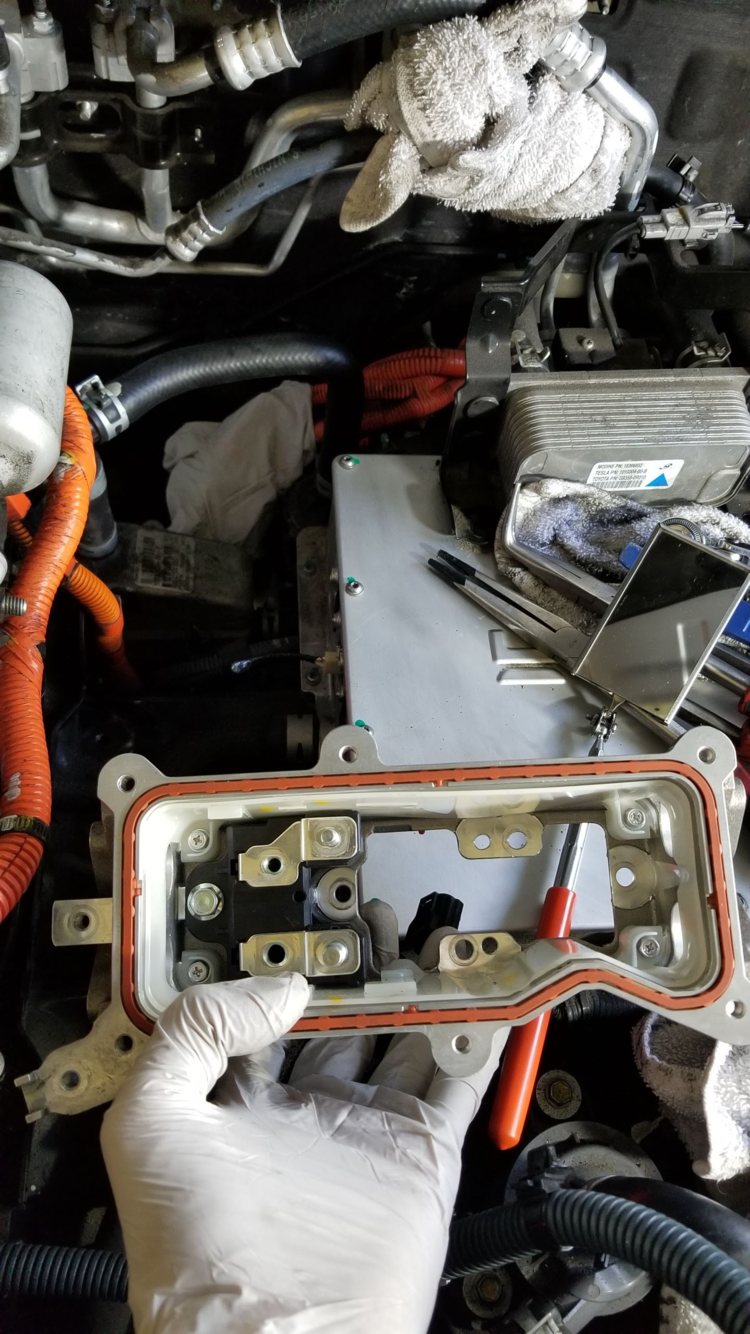
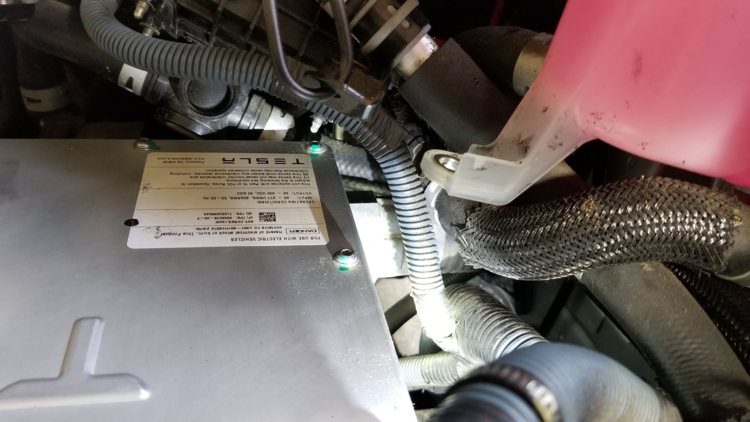
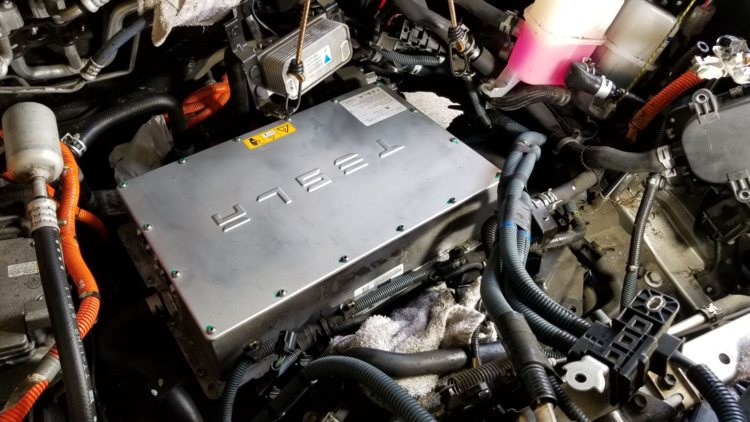
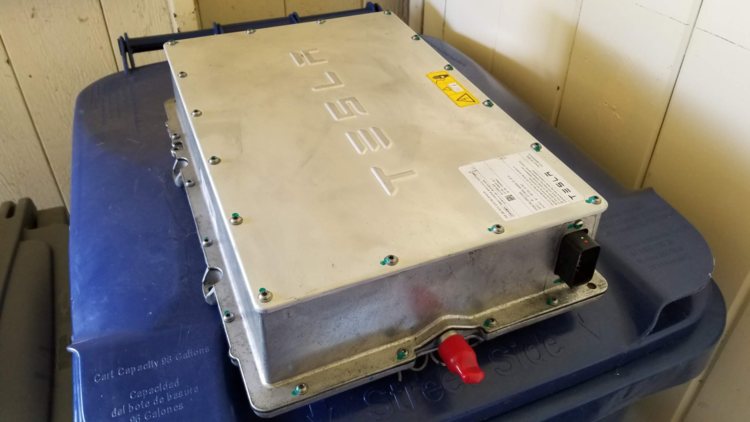
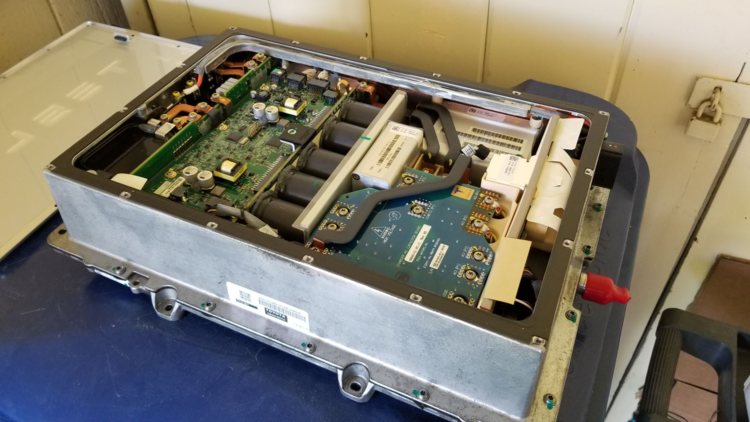
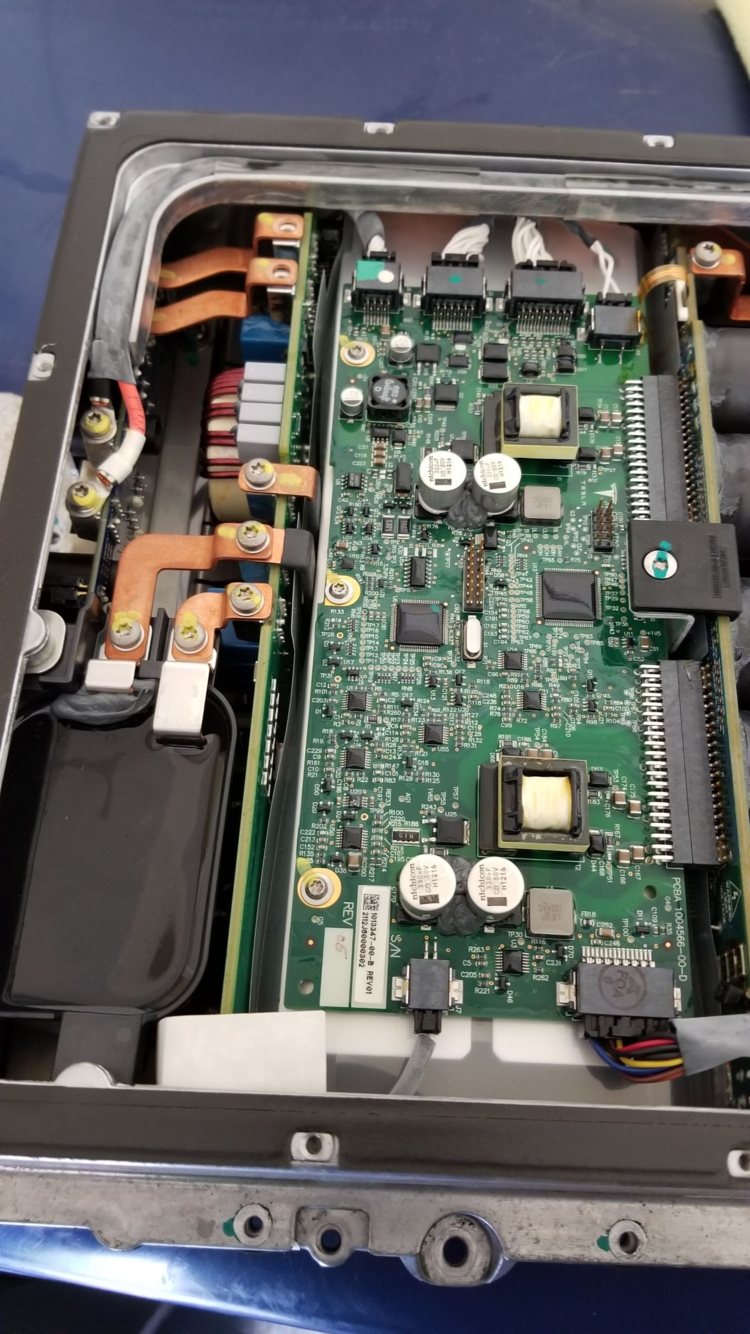
I know there were at least a couple people interested in a write up or guide for the onboard charger fuse replacement. I took a fair amount of pictures when I replaced the fuses in my charger, so here you go!

First off, this is what my car was doing when I plugged it in...
https://youtu.be/5Msfjg-_8l0

Basically you can see and hear the known good charge cable attempt to charge the car four times and then it stops.

Now, if you're good at working on cars and you have a fairly complete set of tools... you might be able to pull this off. Have you ever replaced a timing belt and water pump on an ICE car? This is kind of like that job, only with high voltage (HV) components involved. There's very little room for error here. I had 3 large egg cartons worth of nuts and bolts by the time I reached the fuses. Egg cartons are a fantastic way to keep all the nuts and bolts organized in the order that they were removed.

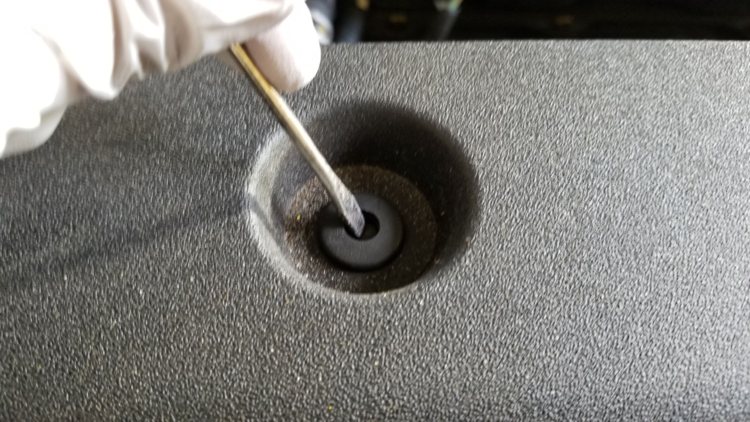
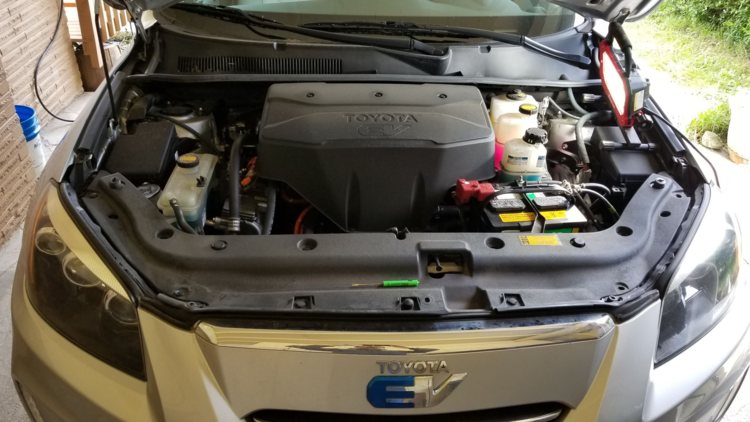
Alright, step one, remove the black cover at the front that is held in by the world's most counter-intuitive clips.
Or8YRJMsLv09cm6lK_YE5gOBvgogRa6eyRpbbR9h7pTICaGvpTo0j0RRmdRkfUmg1JGiDTefzbxUDen3lc52KJn0gjI-0JZZdJNA2TC9c-PK6-5ghhvBxU1NLmLWDNHWBUSSMj3qiN5whTSMmDIftyYGnIsbGYjMHcW_SXOV5YRtOxkjYCde34T8cAloCB4g-PC3BSoLKbDcdHBnt4c6I1ATs6XtXQn51mXt-TiJKa1L9KF-CeWnZ32Z6CAakb7ER7gOEoQePNZp2r1ompp5am23PBzq6VANhBo82Dak3m8UAU-XhcZkCty1uRb2FinhvTngpIGmM8NSlnFX4ZLS_bhT8kVWkYoVgLngwjilzsyK0nYPrOI-SU3Ba1zEHnUH-7KqnXpMhTM7M_4f5teEZSy6gEio1iLWsbSyGqc9KkeMP9I88_DtgU1bxSag57oH9sAV7xUg_gzlNUImqKjY5KspMFCj2MOzcxNe-lVWaqUvi2QkIDyI0DqQuH6pTFReKT6kRJJ2Iol1JxPO397Id9CRiu2MzEhgMHhvq4Ba8IpI_EFHqJennp6sUnR0UEYz_A5LpP5UNLaXlKVWDRnQfxU98viYC-QFHlIRQZDh6rPkiZFp3_sJPTNgXP2tXHmWPA1WIjuJySowFJMgV9rPahLlaGu6UAoI02mOGFX5mKuBX7isRlRf9DMfL00NQw=w1112-h625-no


Push down on the center part. Don't worry, it wont fall down behind the panel and be gone forever.

iNs_b31M7IrfISLqExUnUXZGylbR0Gnm0G19nSemC846aryCz2cpUyeKt2wOkkGDryz_VZFE76TpKtJd_yYw7Co_VbtD0MovNuFycIY2JUOkHCAnxLgmprCMg9D6eNxaPUFxHjKfs8cXRHYyR1awqylbMUEbZSOBcHE3B0inMPmWdJEXwht2jM2sM4TryOM5sZiKFYkuF7-hznJd5wkxg-oKpePgO70_ZUz7-FboxPNLUrzTpXbROPq6hJBLoMiaanIC_vQaiShyckseIAA3mDeFuU9DamdeOerzE3-LNQTwoI-WUDbnIqH0GTh4Jbz3A9nIjXumnvN_Zs-YCX_ZI0_mYF_cL3urIff8Op33DIfZEq1gufUtyF8YTy5pff8s-05x1sdixAGBTLsfieVpnbfSnT626cnGxwtiv0QHm3JFyZX9KMzSdFweL0EL1ZO-gHL8-KBsiir0mU3dncjBbQd723YbGzssLhdzx4ruijElQO53nCwRwQqMVFm6zLFlnqOTn9p93FElnxVXOk_VPKaStCK0jy-070ByHcGypoFFL9aVdS8X6G5dIrAutNm1IJ1mq2_uWvqQ4UWuvJIRUNIUDEfJDj4IyDfgTB6s-F14qmtQ_a-bwJvxpv3gmOUEsTY6eop7w8tJuCSLOB2bLeJHv7_MUjP45Swhj_Kwot8eW1ChdTo9oEr0KGbLsQ=w1112-h625-no


eFQtS7MrL56vWXqKvYS3LQkbC0UgjXyhNB2VZc5Xk6EHW6-5SKIeDP2JjxzR336gYCNbzB4iiul59n2PBlJu2AP94UZME7t5BCRSEutBNWBAxp-9HSeQFdo2QHeQbf-5C3gZcV9Eui1Fl4wIMZ7CbNdeF2X0q0t_cMUUzYnMpXMhod5rP4JYkFLCf6SzgGWkIfKBHdqXpNecJg-LrI9mO0am2J3Ewo3VpbJQUCDr-kb9m2hd-TQUnsgkDIik1UeVGv_CxZKbGxPNzV460hqJrgOBwclPbtIJDHrXx55decMQ9YbTt0wgGMp4bGmf1AloRcaSEz8CNxKwp7vxAwJC5whpJxuxBO7xHm0w2NyaPY3NyW97HicGGWR6PDY2ZKKr2LE9EzkzLp6yYnmk9IR-s7xaNK1_qzQC09kAsTg-uetiR7mujtTTuEQfQpCxqBGYqtIgG2xYWtYYXYlYKkL55lqPbWncxTD2NbYfQLcNssTqZs6HP7YiqWS7nNNusYnRIMg0I5ZHijPwSrl_YaqraM2wcdJQRLJXqH-uiSeT8Npi3EGUnp1nnEapTuIg0-qwazri0pWzKZmJan_JESJC9I0GW5W7FdMAN_cK8jygE9l8MpnH5T5JGtTTrP_QpP_38tEmVPE8M5RRvQTo0XQ8FDtJaQtDPFZxEuuPSymuZ0kf-cnc4K95s8H4ly61lg=w1112-h625-no


5szf9R5kN74o6duudYqCiUB6ea03w_xCDkSNhCxsAysWg0LCw3Yk5Cw6ct2pMLJ2ZXzsIHnhsBtRsiE7LWXpnRLriRyL_-wE0gS7H9vTJroTRXgbebCMPSHrFd5E4ZuZIaBB5ViAswp7t4Azym_M0bxaNGaxHdL9GrGyn0BGTKkbw0E6nH9Xp-UgjvUaW2VfVFo-9Vm0PLzUnDTkYAlvxZxTN-hu6OYtsmORX-qsZLUYMlVucoDCPqDKn1rhrSKFZI_2zYYV3uI3fSgrKlbR3Xmoga6eKrKIxZzcLXyzsgkoLxu13yrHXlbJ7MPXnyhrRrRwdBpZnwHs7993x3mp5xDLokMOVSZpTTYaPa8TlfR9w9-9I-RMa56ddmkpkpqlvI7SegnVNWCvE7do-w2m6LmkOT4VPyLDW9yYMW6_dGxB_bFY-NUZksMFP4ALJsUegobCxL9REk3wYvlIALup32Yi_i-aG_I72Q96DgoUMLKQmhSUXd9lMISP7Z7x62eePcfn4Wl8K1KeruR5MfFTq0BGCmTTwmhDvlhPciNMUF1cmK4rDTDa5lKsjuRIZPcyj7ecXSpo1TZN23lMDMLbPfom1UPlEB0QkEL7Lf8n0w1wi7zOKHrO97v6wMqqm0_DnPZqe0MgWUdEYASIqGu0IGY-jrutygFcLdbDndXItDpt6lgoMvLTJi5Vghv1Aw=w1112-h625-no


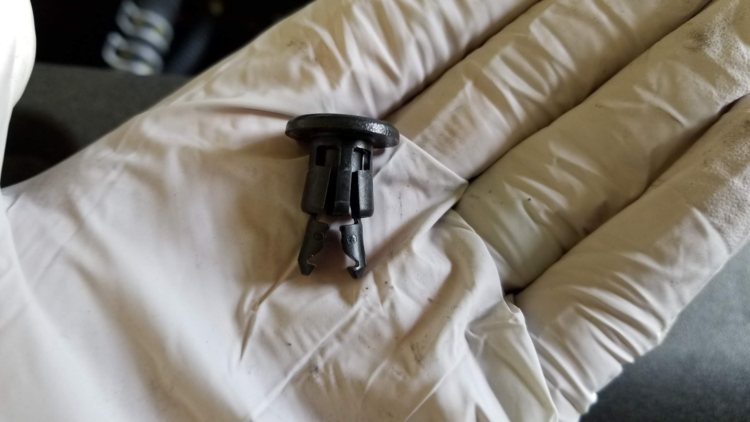
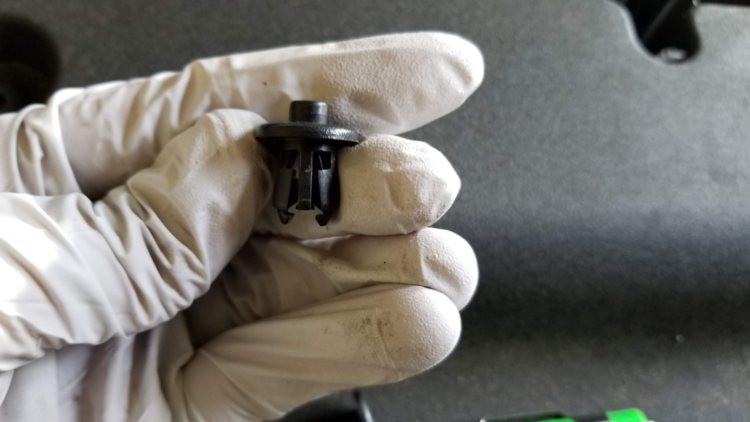
To reset these clips you have to pull out on the legs a little and push it back up through the center hole until a little nub is sticking up through the top of the clip.
Ib8ldSXm03RPOuTaeTQvqEYXj_tNxVZ-gN-2Mw9JwL29hga9ANHr8aJFXIYZ5XBaxoGQsLgo4MEXcNuJywiNXKDN1PHHCacUt_ns08nD_pcU7DZwu5tS5whv0a-oWGQJ7DWie359_PFDbNy1wwTWHO1aofi8ALfCm9NBp2FeRIimCqDgol_Cq4tsw9UnnYonuE4m1yIFznuQVJ2kUGBx3zCpK27eZwv9TsC1BAOg3EZ6DoCt_qB8b3KuNckrC-ZX9tJpgMfx-m1EZbDOFlYmqByLfj6cIlLmNiM9QVVi8L7aofZs8Q460HnXi0uK8Gb8gge2fJWtU18MK7VVN9TdsWeyMaDZz_v4AYZyD0oTL1PWvVVnXwBM0wFsGor9OwmbX6wQ8URaMh8YFgNvUd9BzDgbw4FqWKltihRR0sA4w1rRzppKo8qrVBfXjtzUTOJFeQ1NXs807kRu7m162kYl3xAWfqG38tQcN-jAD4OVH73jhHFYh2atkAVDId-j65qSiBY2QaswrGLvYL0FTmyf1olZOOHTMI2ii22STtEC69a4LkQR5nCZR0Uw274BFvFURUdFhzVPxNf_Podq3uph6T1oEqYsZ-G_HQW0PkKjs-IWHv-Ib71n90DROSBzm6Dky7LIvklO6nCV2orbdt2Kx5OEq-XM_pXuoNhy8gQPV3GUI_RNQX8OCN6dEEMlnQ=w1112-h625-no


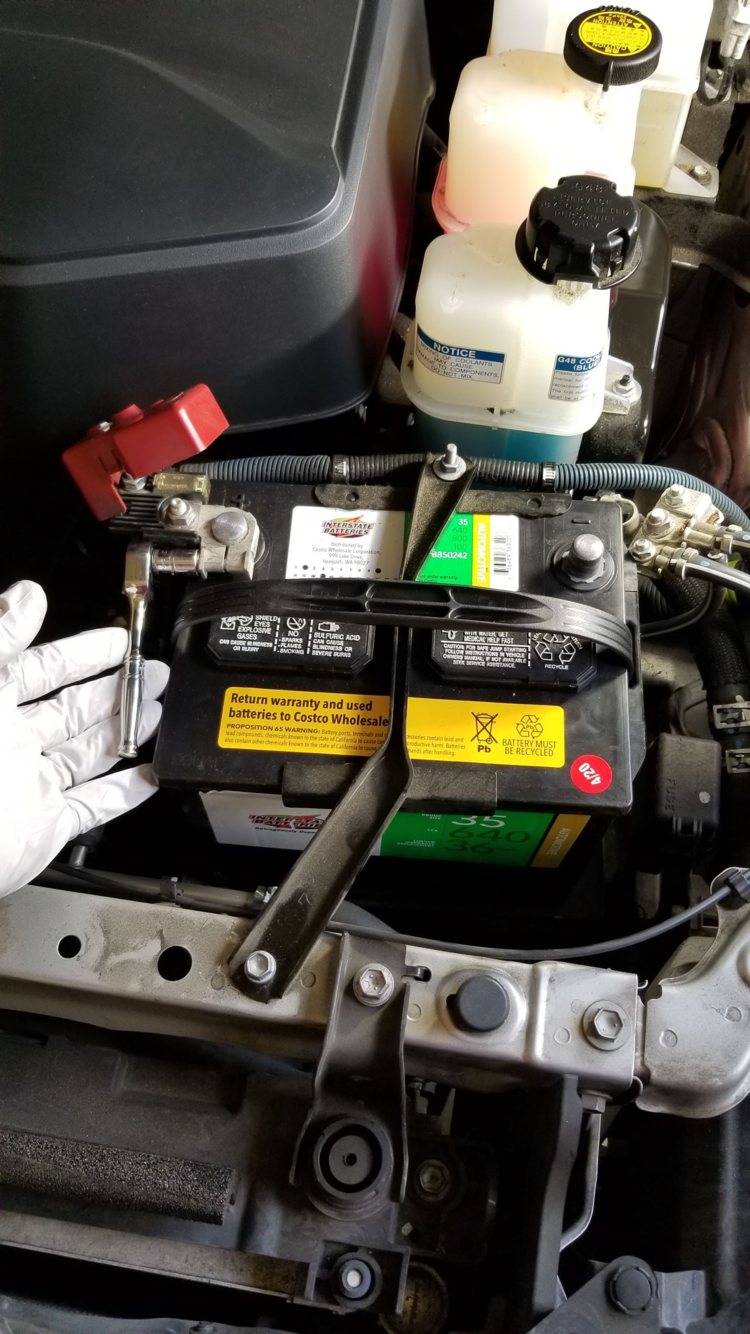
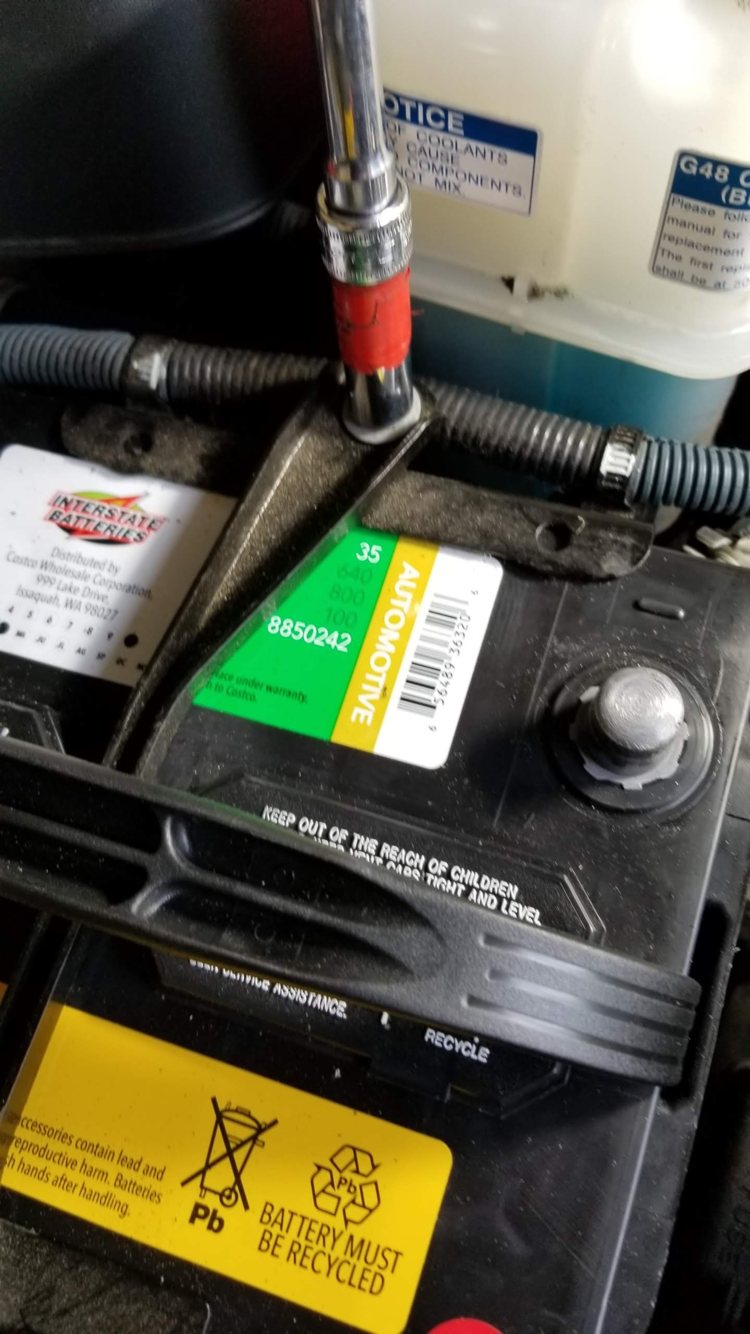
Remove the 12V battery:
ysL6IcPAulfMNmL4ulmWkj_si7rodPtqMZC9V4jLaqGYpRXytllocdT6EFlQaPsnGLIC0C8uiEeBBORmAcSEKQOjlOVRsgZmZAawP6-SdM0qVAmeKces8TrP_2PY1FHlKMCAh-v1NuW9RCz-4zSM2mi276BtRN7AwjkEGhqV8ouJd-M08neSryN__Xqy8B89BBvlOfMYLf94zOANbgxRzI7WuVraj9PMR9duTyBO_guT7r2_6Mut7NuqUEagxpz73aMvcmPYMTHlvbiV2xT6xXhxBbu29fiMxW1h9K45GuKT1U9CNsar6CdJKQtImIsuIv9AUerrK7ok47IiMprlUkpTwcioJimqTtxVwu1JoDtD6gxf4uSPd1VujIfxlsMes4QzBw_3ImjelanC49j8jnxH72mPNhJQowxY5OpVXVlmMcjdBeNi2aZFaBpW-g5Q3iVAjxnOm7fafc-DipiBYLIZ7T8HhACFM0jClE3LSqd4RR_GiISgkO5JKUcpMdFOEcSSYEKaTHnTchTAW5pFbH1xlvzWpUwmz1WUxZnUnpKQqdM5TIbkVgXOfqegl_A0_0KjjvjKEAsRkdXyQUBOkkRYYXswKXrSbT7AkMXz0cXJbEZPBp3LUEWVmq2XbhnHkPa8C-Wgnm8c7929IqKrR-twUCeu1sm4pujjxjsNH7NJxu5_9wLdg_oWPWNsXg=w352-h625-no


After removing the 12v battery, remove the HV service disconnect plug under the front passenger seat. I didn't get any pictures of this.

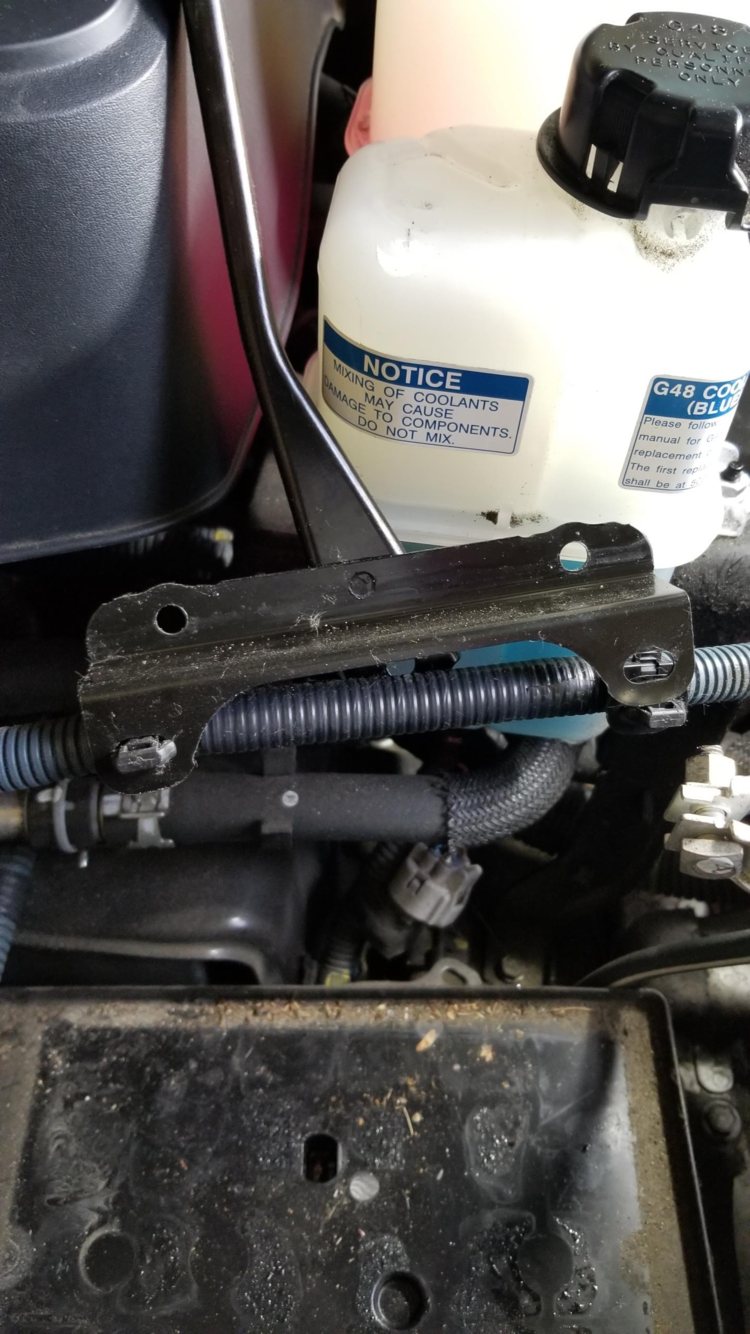
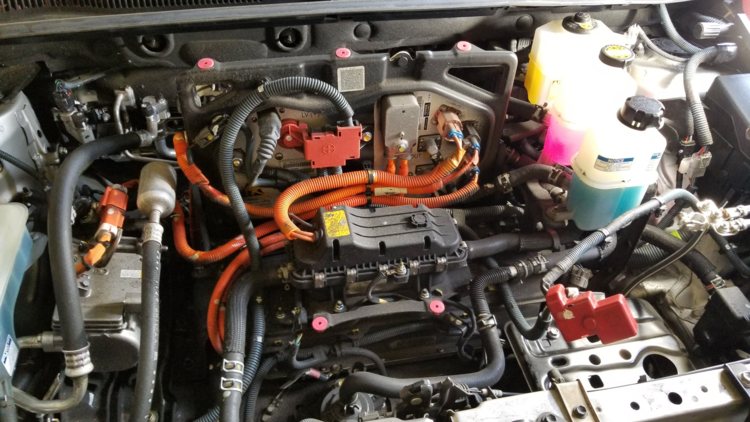
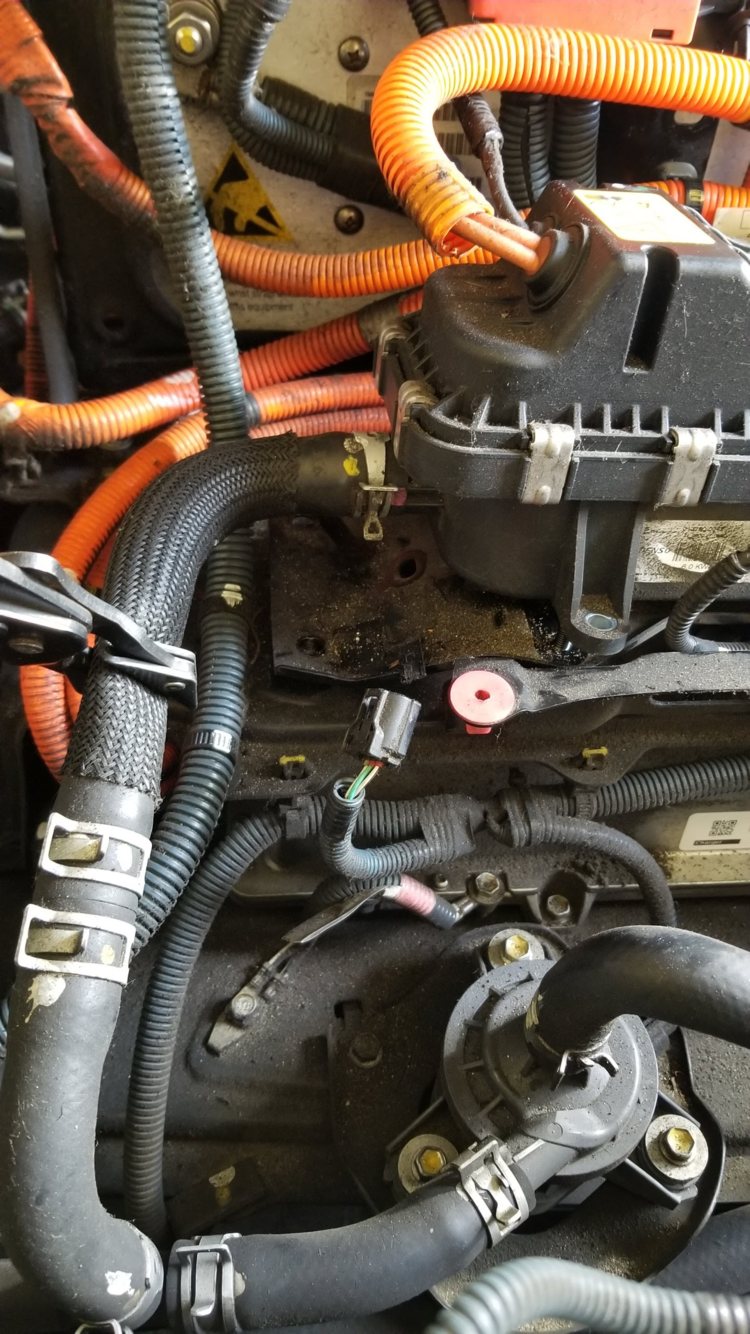
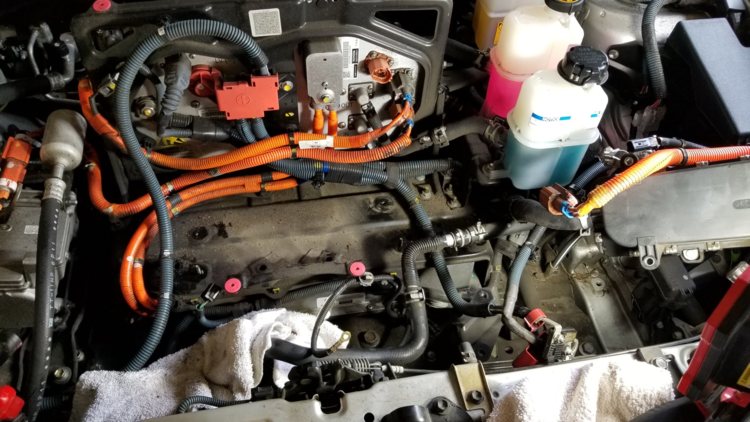
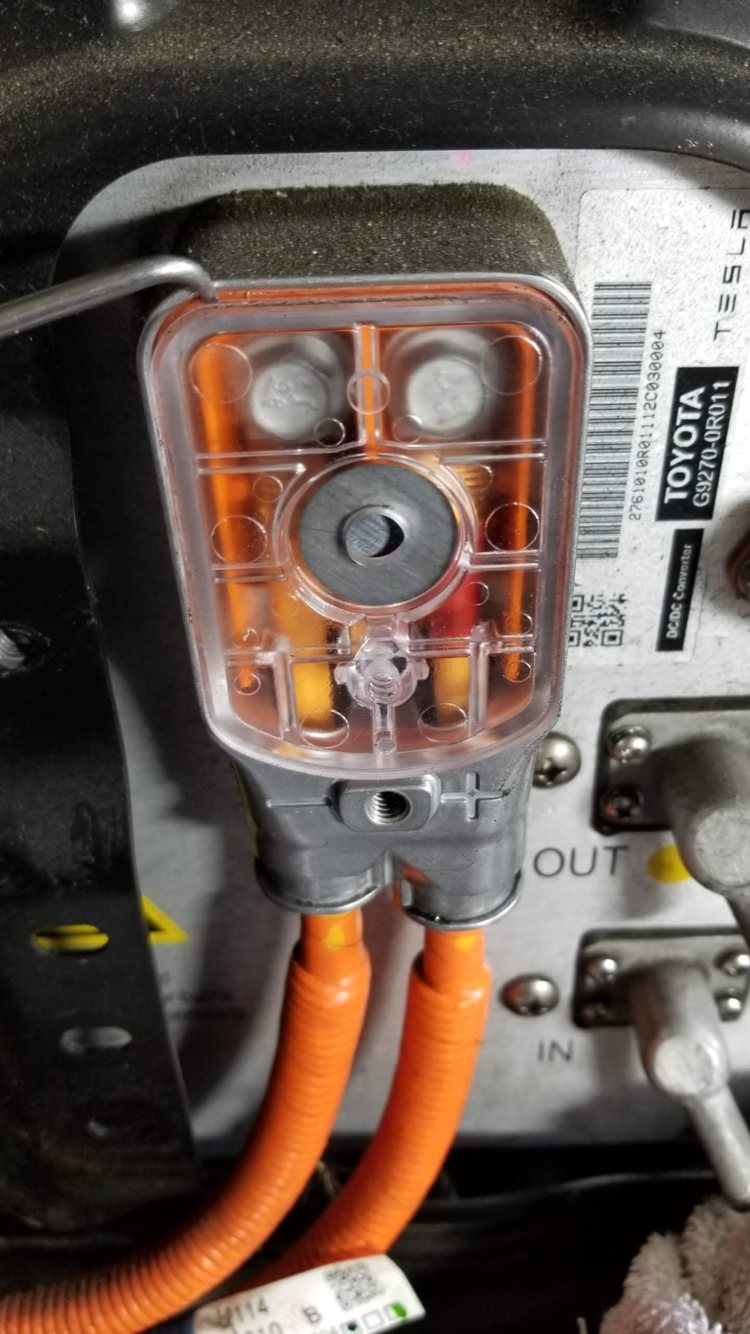
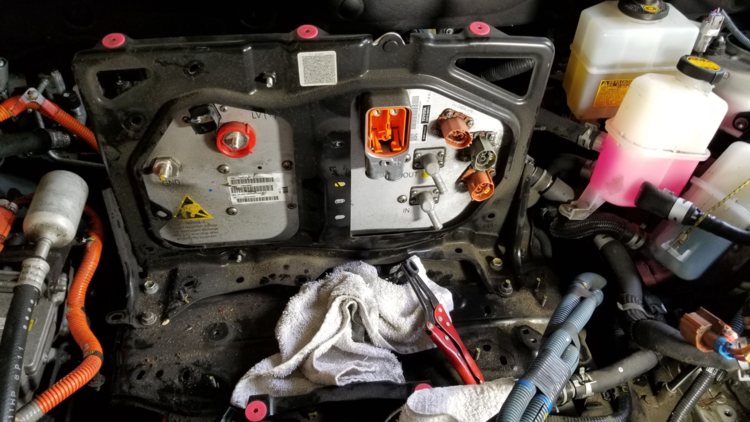
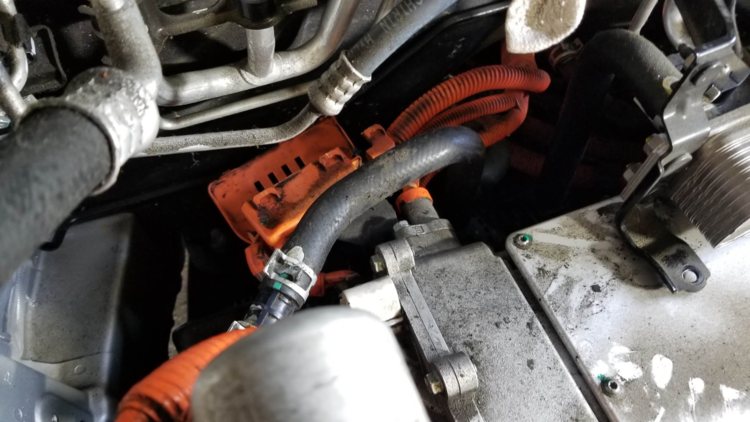
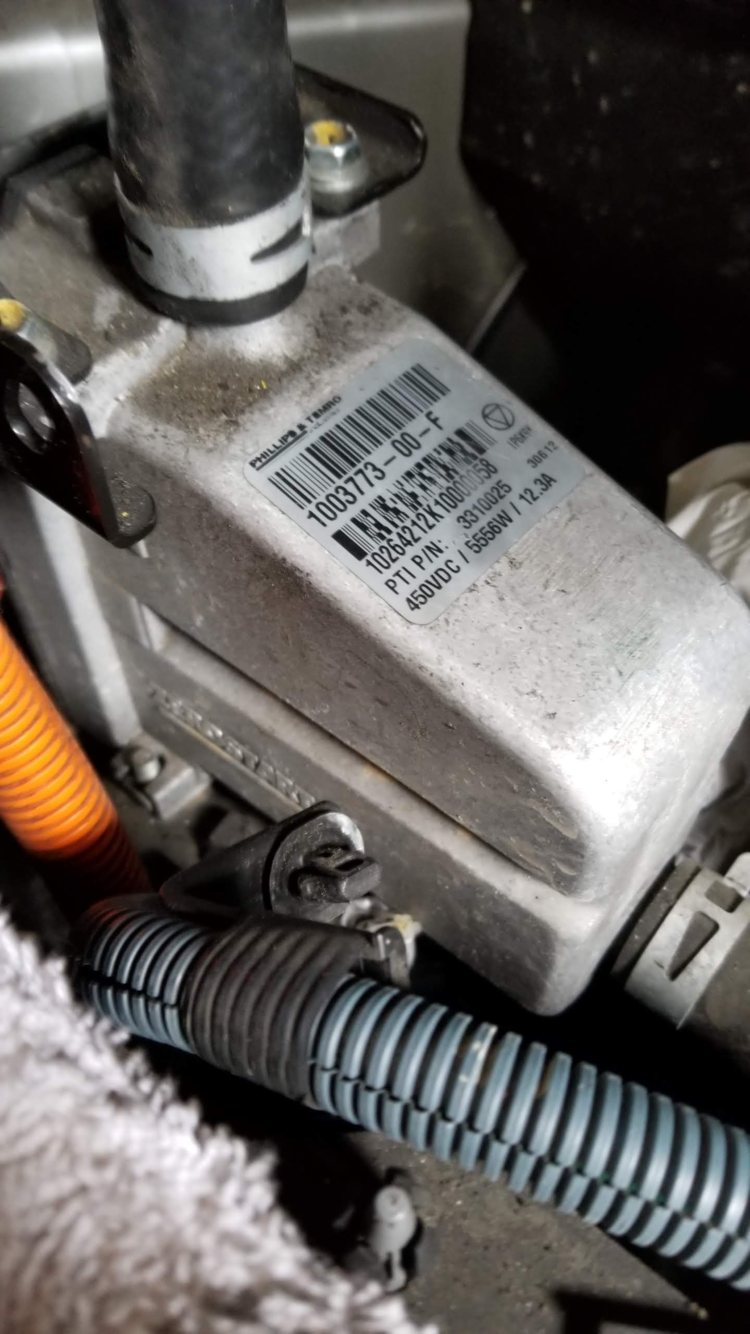
Also remove the black cover for the DC-DC converter / cabin coolant heater and you will see this:
Gyv9WRRkaorpBtfZewxi6XwKUsZDz0SLzCZzLN8dO2OVkYccILOeVCIrl9_2b5oDBiro4gg4mDks7LpL288YUPaRKRKkNzTywNxBtxx1z5mfPjwZZBLUPR2nSdJvu1UGVqXjA-y97lMOUkOnyCV4tkkl3f72YhHni671zRsa5XbAtR8WJE18VMzCEOnBxP8ARYXU0e2pcMny9m0Jn6e05WAFRpvtf9yc2v5XAwPEhVrcbXIV4nXYUBTgpMpyxzXJeDaapFgaqU8md1kxvf8BhEgYT6Wor40MbJClxFw6YPvM8LbcMpJbZ0Uhf-tff4Be-QIdoZgSCM1EKqfpya7W8xheXAmBvrKCnh32GK6Ow3I7vU-urYTVUnMpQDz6VmS2kzH3Uv7YvRezz_t6zsLluPNZA2BzKR-fhUMozfpV5q5JiTGLgHQUkuhps50ji3vz4EtRQEaioU7ZP3ejnMs2AEnH0bXzuJoi7VB07tQqgDc27ll4v5y2pi1PybW65X-SUL4CH34ZO3241pgCIkyBZ6qzgtP5RRiENyf5Gc7u69Qk1DfxBcTBoBN4UYyxeQ0eEKV3PTVyHpR2SpSLLh9iLIGkggxUQKiAhBW4OTRli1cRnWwuYa58gCrBGslnDZSp7lIiEGRCyivK52HGMigmwj2JZjMsg17istERwJAQVt1AUrm78cDXhHDrsysU_A=w1112-h625-no


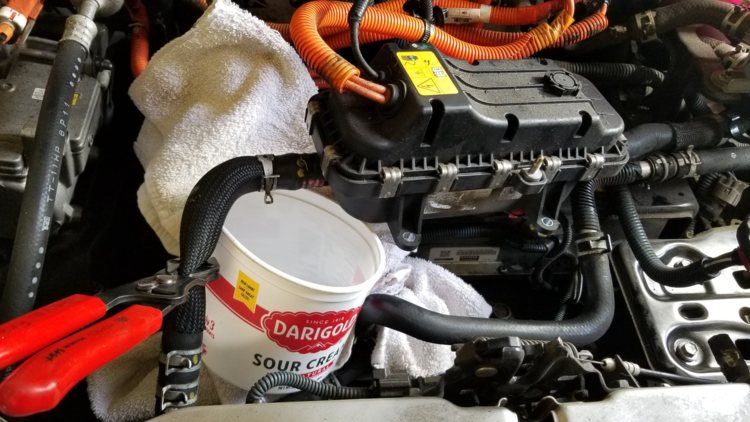
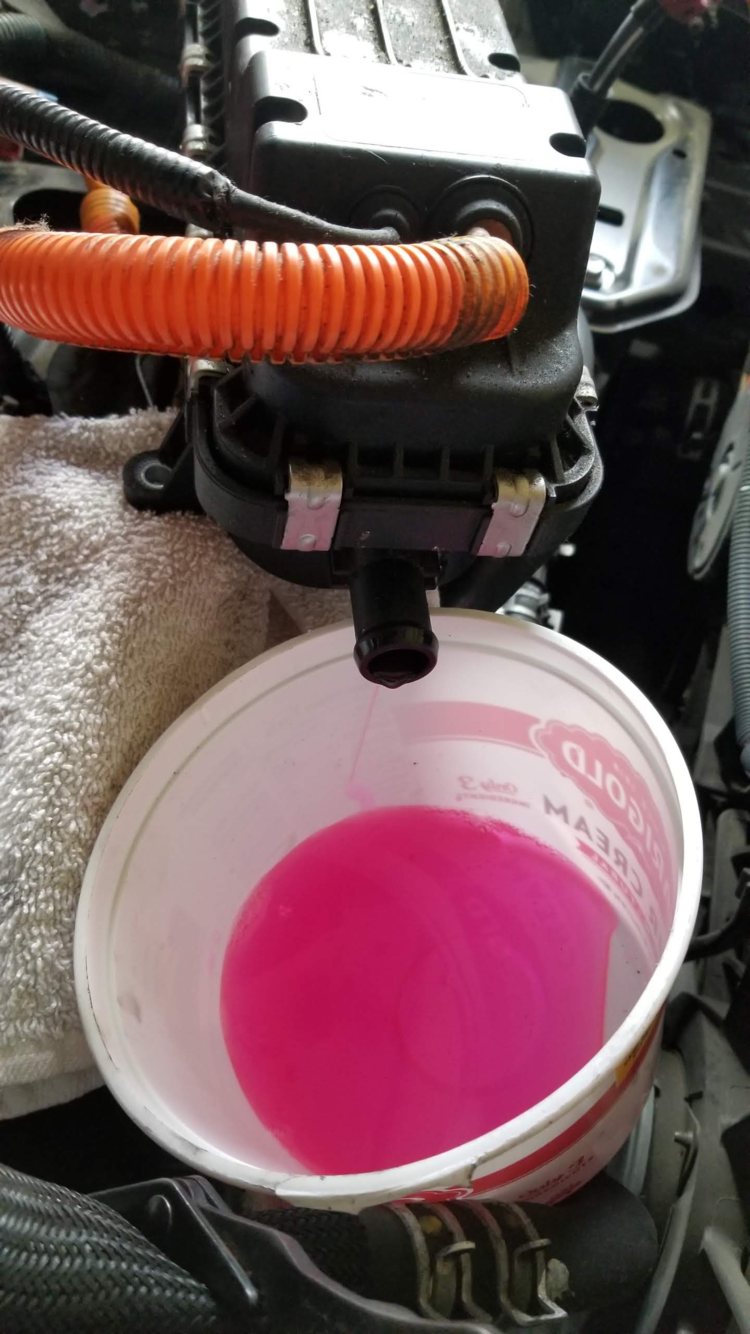
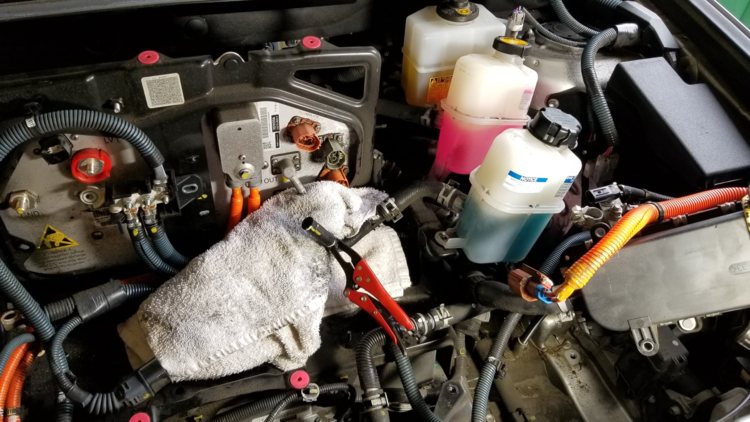
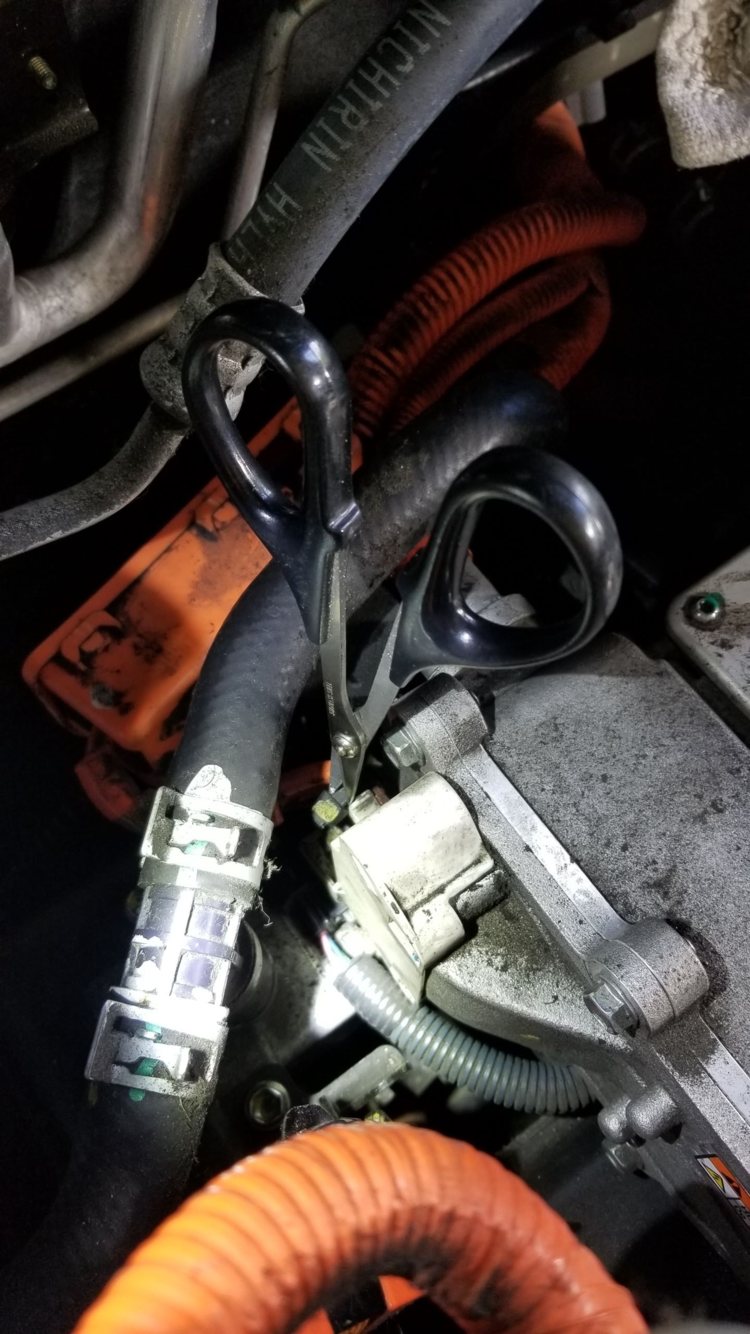
Get your coolant hose pliers in place to stop the flow of coolant and something to catch the spilling coolant in
5ZHzMrl-taEGewA1onbRhwBnAuMEdXh7M4BC6Mr44dcUX11Sd2I-NxO4lAfWjs2VykoH84O0DdWq-D9180wTH2B7v-PRe4Jho-TD8EDODDBzuct8ZS1dKQTt7b16i-NLmzGsRaG2vsgz2dqP9vhd19epX_D8ZGsIgmesCjYzCA9g6qFQrDJwIint0nmeupVRUOzmyrZP7Na4w_DZDzZE3CS3TyGmupNzFrcs5noY9PzcSpNYSxGMQSkK0Y-OKpgWWeAw-q8tYwdIYwPVtIzXFKN2_cG-RMhgFBGs44D8l7wLmi-C3uvo4QyR4LLqTSHUnvLXupm_dZgFqnrP-nmekLktXdY3go3-wLeolmoZ_9lckbRPloFe1lRoV-1KP7aIaVSIrnueaR6TksXKpGGCmU8i-i_BYyYa6J-TmoPcdiaWhK7gh_0CwCgadGZ_IP_r7UzSYvkGnHFMD7OHeX68seEK12a1ct2sEmx8l23gHwTR7NYc2y4_219JyY90i2MUlEX7YmHkL19d_Ry8anNtRr9eHzouV8Rp-xWaAWMcjgRh43ivLGhdgVfipfouWEp3RPRRKVe2c6XHJI7h3DXZEsZPDBSfLvYJs4jgd3VvBBGYZWH3hFZEuuf9Z0ve-xIZBAM3hT5oXTlBs59gn8RSXPGaYpH4pRkjL84jmpueYSVNeUAg5Sdv_-WWtnzQVQ=w1112-h625-no


xSnw4Nz4adpyb5axD6XXP_LDEYFsptLJVRy7XiiLVBztPBOB7PBEx5_WSizRF5dIIbmfjaYT9BU8mkFXlWw5e2AJb3JmPQilbeg7nAuQYne3-ICnW5I7XrM7xKW4Cf9o20GyimfpM-1Hxs__PZz6zxia8bM7Yg8DcbOCAOPdlervYxDp0WX_Lk6SjmPs_gVjuzRGH_thszo1CL_vud_fcdOLTlFjfAp74OkBm-925JlUFdhUiSoR8VPJA_xwJRNoZ81ZAPFCQ5NZGHKKWMmkJ1cNRuBEyNr7XGoygq3GgAyKFDQdXn4XxrnLMv0flh9Ovaf5Z6PwWV2qg0z91fNsd--HpiHtfHNHjYHtsAt9PYHUzJKLQJABJYSpCjX7WFsOhCurumfUEhebP20zzL4oGc0y1ZVPUC1gVBUr0QcwESu3ipNwOteSHVbJOOk8DsVdz5lczQ__AMf4zBFCDuwzzc3gvZmEdV2kt_wsl93-bWkKMeVix3YO9kjbOwGEF0pZslkwHit-q9uIHngZAlwxTFxMWbJeeAI1xDxMAuAE_-x7FUxAWp95sOrktFhdxfZvfoYoVqw9oorIq8ivGhR6knxGFzJzlzRP-mf7u-uLS_i8Xv2y9iJqMR_j-xcPRLR-DTej6mFfx7kG86Rd72v5xoYyKNz3ch_ZI8zl2zXsSc3WOq-WEwqeDBJKXQT1ug=w352-h625-no


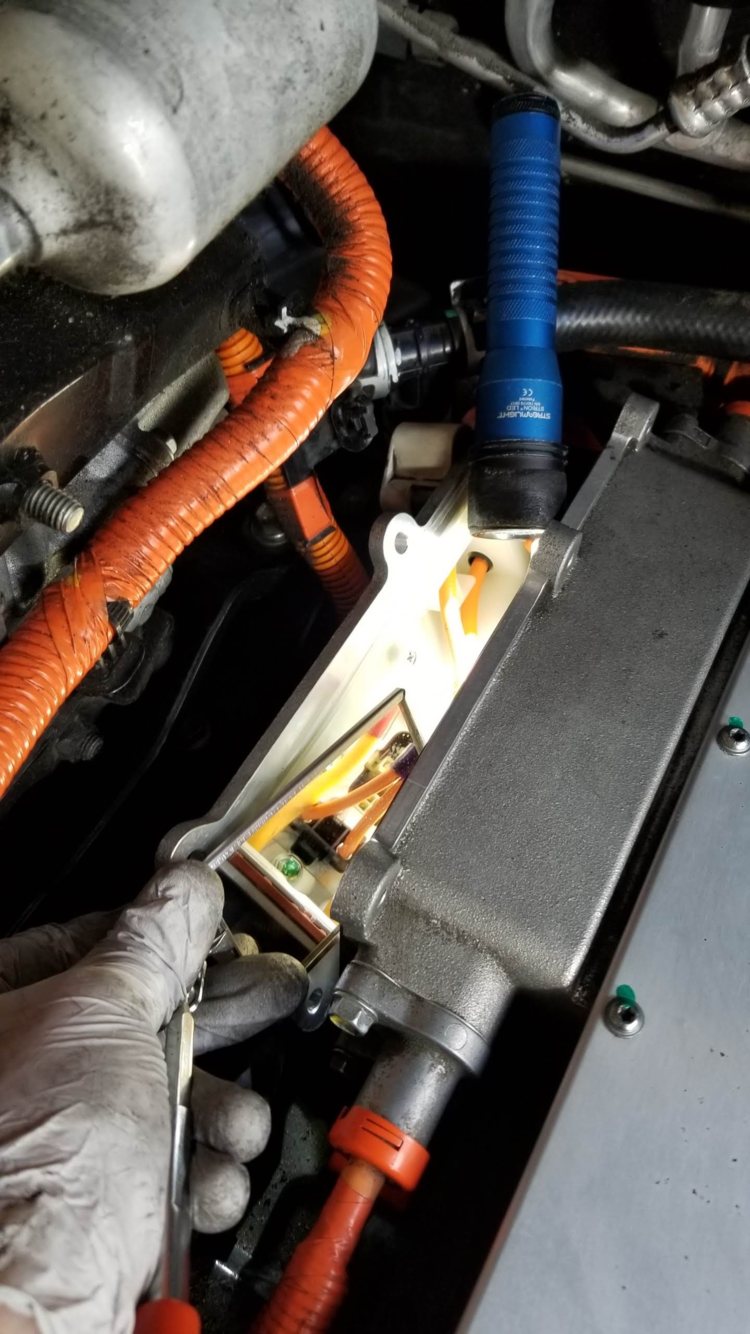
I left my coolant heater attached on the right side coolant hose and used bungie cords to hold it in place. Be careful to not kink the hose if you can help it.
H_9GG2AZqn3WF8ZaLnuVW0cMu6eBntjMHao8DMrSyOlDyLDonkWn3tJkgCDTngB3p-KVtxLTTLTFy0-JDrL1IuGadAO_UwkGMhzKSvdmshU-OVdKEHiUIJWZ1i0Bb4r-6whqIIbH7iiwx9tutIUjsDuG_feTauN1O3XjYrcYlbJBF65NpJk5O6liucv3LJx3sJ7CsFt6CI7LUcc0PLgvuWEYbIORq8z2I62jOrJYG7HQX8YukFrWDOyniVGC4nivVWAwnhZDmmW26Bxx_JSq5vsk1TswxGrkerRkT3h2yyfD3bEDFBnwveQa0d2IaIw2bBLq5ByQ-sXlGRDIRka5hiEA68BLk0ax0bJABhrXa5BM5ZJfwZ4UKx4_AWi6Yyfrq-mURypVpm8r2FcdwxbzmA4L4MjO1PyXWTwCyrt69_TM5UyJ5cVq-QDVLpOnxsVwi4uWyI3Zw-UeXBtu4dUW4vXX8t5F2j158llCLwkdZI1HpSCLjhoRsBC8rCYMNt2Nq9fhfRWa8oXAw0V-KLDcIdqXcWGUMNPPMI9g8fzYiKdon9wujG-tdJ_oDLay6u7DPy0MEayVnRIu4FU8ROZDkKykYuAnNDhFkL3gf0b6qiUYVr5pI1ADPoCajgrfrnJ10M2RE_ukiiKZBRXhIgWlxAPJRjuNeUtB89LGvJMpfzqibHcFocQM8DysIE2BR1k_1FMAKA4=s1112-w1112-h625-no


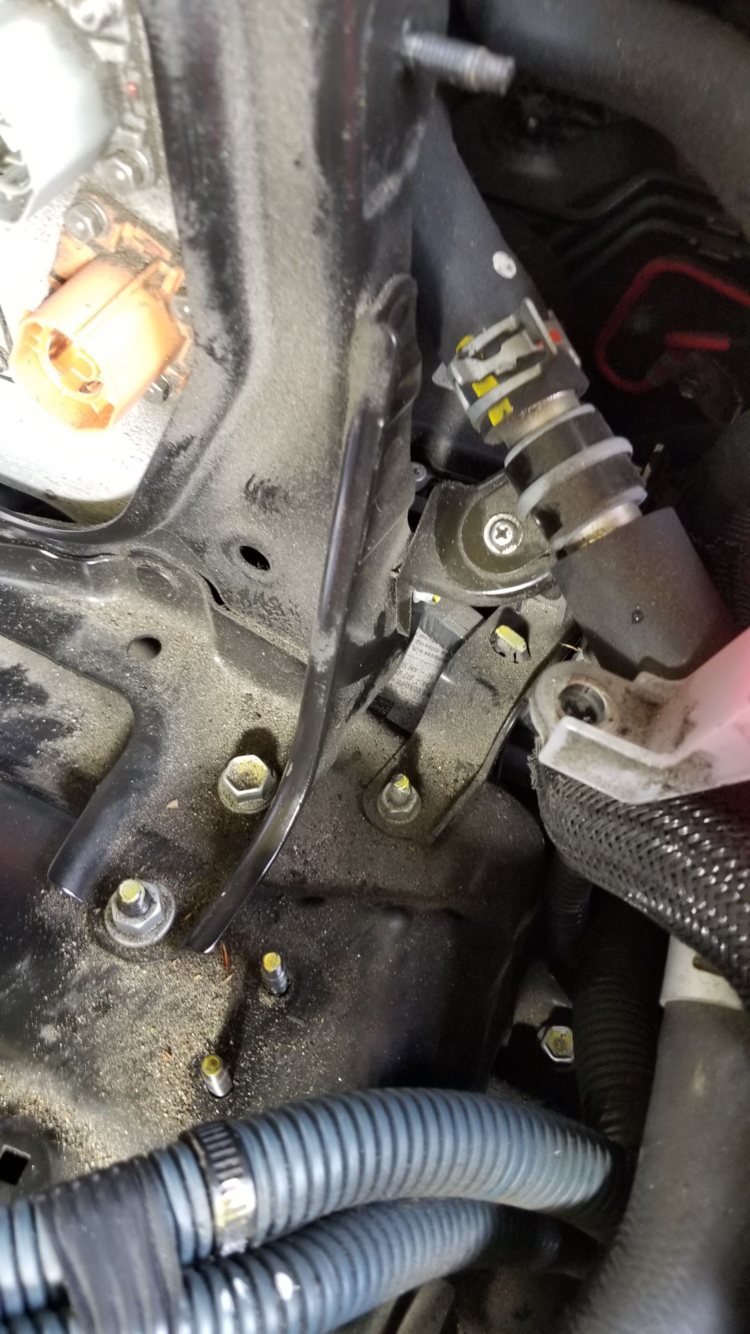
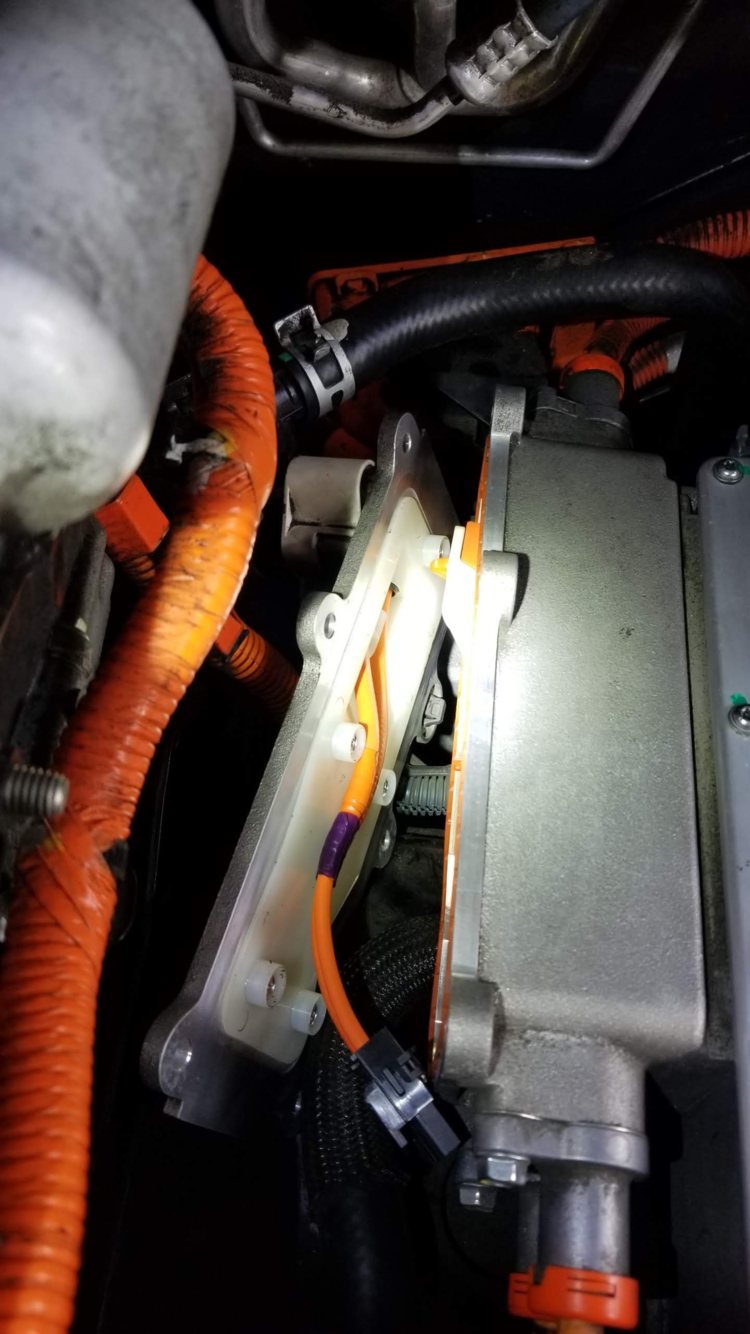
Alright, moving on to the removal of the DC-DC. More coolant hoses to deal with. You can see here I'm using a small pair of "toothless" vice grips to prevent coolant from spilling everywhere. As long as you can get the end of the hose above the level of coolant inside the reservoir you'll be OK. But if you can't do that... hose pinch pliers are your friends. I should mention here that you will want to go out and buy replacement coolant. It's nearly impossible to not contaminate the coolant that comes out with dust and dirt. Dirt in the coolant pumps is not good.
5PNPlQa53lekz4CMRWRgK6d2kg0MvJ1NxPgmBKFlJ3MINhdi1BSQZMjFdM5E68vlw188WqG9vZYs_RGgu4l_Fq53aJrhFhbpPhIF4bQrz5yLn6A8L-NRG67ypYLWfUMBgn7ky_-CigPzJNTsXZZSGnpX5kq8A8Yv09FCPzrV68qgsyR4wLm--G8hszNdVoonNCf2rebIxMLpWarA1XOcc_zX-PR1pj8s5gXovruVx6cTKzCnBO9qqOqctPD6uSRsrca_96c0AXu9aOyZEkA9ZvXhGBkyu035yGzburyODVOFQ0XFbXPJnFpn_0UO4GZqKnuEVza1BSgDT9VmfPJl5sIqFM7bY2pTWqSyvWqAm_moBFwL6ummmp4oopYNNGYRcs58PYKBJLQ2m3dW-3pMaRrGL5lDqWGwd9_scfU088uzMQUp4nTwhDhKs2Uo5NWranLQZVE9Hs0vNhzEu0-mdaRyXYHSEUyJvKuaJrNAZ7h2ZBsbW1268yJBZRjSit6MO15SkpgSpjs1AokqbjFP6i49Sk_QSh5H9YMdz1R71rDPbN5pmmIMQ7kycznA150m3UsnPIXOfr7xxE1eU1gwQaRKlHfBcfF06vBEiKkZP9ZlJuR8pBZjRdd7R14mGp1SSrV1sONociY0If6vwFF6NfXnwveG_9fJwX0CxvZQypmYuQX02Vsxahil0h9Heg=w1112-h625-no


Whew, alright, I'm tired and going to bed for the night. I'll post more tomorrow.
 
Your pictures aren't showing up. Stuff posted from googleusercontent usually doesn't work. I use IMGBB to host images to embed in forums.

Like this: {img}https://i.ibb.co/9GrMZZK/RAV4-EV-Shoreline-Stock-Photo.jpg{/img} but with square braces.
RAV4-EV-Shoreline-Stock-Photo.jpg
 
Ah, OK, thanks for the heads-up. I'll have to put them on my Imgur account and try again.
 
You can edit posts here for a fairly long while, so you may be able to "fix" your first post by pasting your Imgur links in place of the malfunctioning ones.

This site is phpBB based. Since 2006 I've hosted a phpBB-based forum myself, and until fairly recently it didn't have file hosting functionality built-in. When I upgraded a couple of years back (a major PITA, due to customisations over the years), my site gained the ability for users to upload images, and that made things so much easier (for them, not for me, as I have to remove images every so often).
 
Tech26 said:
I know there were at least a couple people interested in a write up or guide for the onboard charger fuse replacement. I took a fair amount of pictures when I replaced the fuses in my charger, so here you go!
...
Thanks for description.
I add these photo
charger0721.jpg

and again video (http://www.myrav4ev.com/forum/viewtopic.php?f=8&t=1196&p=29151#p29151)
https://youtu.be/jMHu2x7RC_I

This is another Reason for the lack of HV Battery Charging
bat_fuse.png


file.php
 
Is there a nice step by step guide for the fuse replacement job that anyone else has made? Or a video?
If not, I still have my pictures from when I did mine.
Can anyone see this image?
dNxEECcxi6y2xcgh7

Can you get it by right clicking and then saying load image or open in new tab?
14E8uR


Here's a link to the whole album on Google pictures that I have shared / made public: https://photos.app.goo.gl/qPgzekFwXkuGFPc99

And trying imgbb too
0JK7rZD
 
Dave, thanks for the fantastic writeup! Unfortunately I'm not seeing any pictures included in your posts (but google album looks great). Perhaps it would be worth putting the text and pics together in a pdf and posting that, which also future-proofs it from any problems with image hosting servers.
 
In Dec2020, Google sent me a notification of a change to their data retention policy (all your data is wiped if you don't log in for two years, amongst other things). Tech26, I've put your pics on my server, which won't last forever either, but won't die by the calendar. I've tried to piece the pictures back together with the text, but I'm just guessing, and there's a lot more pictures in that album than you posted back in May2020.

--------------------------------------------------------------------------------------------------------------------------------
by Tech26 » Wed May 20, 2020 12:51 am
I know there were at least a couple people interested in a write up or guide for the onboard charger fuse replacement. I took a fair amount of pictures when I replaced the fuses in my charger, so here you go!

Now, if you're good at working on cars and you have a fairly complete set of tools... you might be able to pull this off. Have you ever replaced a timing belt and water pump on an ICE car? This is kind of like that job, only with high voltage (HV) components involved. There's very little room for error here. I had 3 large egg cartons worth of nuts and bolts by the time I reached the fuses. Egg cartons are a fantastic way to keep all the nuts and bolts organized in the order that they were removed.

Alright, step one, remove the black cover at the front that is held in by the world's most counter-intuitive clips.


Push down on the center part. Don't worry, it wont fall down behind the panel and be gone forever.


To reset these clips you have to pull out on the legs a little and push it back up through the center hole until a little nub is sticking up through the top of the clip.


Remove the 12V battery:


After removing the 12v battery, remove the HV service disconnect plug under the front passenger seat. I didn't get any pictures of this.

Also remove the black cover for the DC-DC converter / cabin coolant heater and you will see this:


Get your coolant hose pliers in place to stop the flow of coolant and something to catch the spilling coolant in


I left my coolant heater attached on the right side coolant hose and used bungie cords to hold it in place. Be careful to not kink the hose if you can help it.


Alright, moving on to the removal of the DC-DC. More coolant hoses to deal with. You can see here I'm using a small pair of "toothless" vice grips to prevent coolant from spilling everywhere. As long as you can get the end of the hose above the level of coolant inside the reservoir you'll be OK. But if you can't do that... hose pinch pliers are your friends. I should mention here that you will want to go out and buy replacement coolant. It's nearly impossible to not contaminate the coolant that comes out with dust and dirt. Dirt in the coolant pumps is not good.


Whew, alright, I'm tired and going to bed for the night. I'll post more tomorrow.

--------------------------------------------------------------------------------------------------------------
 
In Dec2020…
I just wanted to post a thank you to the people on this thread for the information shared. The information in these forums allowed me to diagnose the problem with my vehicle and gave me the confidence to be able to replace the fuses on my own. I used the pictures from this thread to guide my progress and the egg carton tip was incredibly helpful.
I live in Phoenix and couldn’t find anyone who would take the job. The Toyota dealership wanted to replace the entire onboard charger for over $6000 but they couldn’t find a replacement part to do the job. I spent about $130 on the fuses, about 15 hours of my time (limited mechanic skills and tools), and another $400 for towing to dealership, codes reset, and two fluid systems flushed (the pink and blue).
 
Hey Team,

FYI.. our Rav finally bit the dust :( and after a month + sitting at Toyota scratching their heads and them saying ""Its the battery"" I told them to bring it back home so now it sits. So I've pulled off the alpha/OG JaDEMO unit and it looked fine, no issues or problems there, everything was nice a clean, water tight up underneeth and the main battery compartment fuse was good. So was the little BMS plug.

I have the full Techstream SW package and can read/reset anything on the toy side but i need the Tesla 1.1.42 software which seems hard to find (have the .46) but need the ability to reset.

Right now I also have the BMS 071 which is a catch all... no READY light.. and charger doesn't kick in so I'm ready to start pulling it off. Just like to grab the 1.1.42 SW from somewhere ;)

Anyways.. I'll start another thread but wanted to say thanks for all this good info.
And if this doesn't work.. it'll be time for a transplant (for those that don't know me from the TMC/ Leaf forums!!)
 
IIRC, you don't have to reset that code, it cleared automatically for me when I repaired my OBC. If you could clear it, it'll come right back.

What does TPD show when you attempt to charge? Are you seeing the charger output? If not, fix the OBC, don't bother with trying to clear a DTC.

At the charge inlet, did you check the two AC inputs' resistance? A failed fuse will show up if the two legs don't read the same.

https://www.myrav4ev.com/threads/my...not-charging-fuse-blown-issue.2530/post-30108
 
Last edited:
I'll post some pics in a bit.. haven't tested that so fingers crossed but when i did see once "unable to start HV due to charger error" or something like that....
 
New to the blog and my turn for OBC/fuse repair. Car will not accept charge; 2013, 80,000 miles, fine one day, not charging the next. Seems like the fuse because of sudden, as opposed to ongoing, charging issue. Below is information from Toyota/Tesla Diagnostics. Is there any information in here that would indicate that it's not the fuse? Looking at the outstanding descriptions of this issue, it seems like fuse replacement is next appropriate and economic step.

Services 4. ELECDIAG Customer states vehicle will not charge. When vehicle is plugged in it displayed a malfunction on screen. Customer did some research and noticed 5ere is a fuse which is a known issue. Check and advise Customer Pay $240.00 1.Verified complaint. The vehicle will start charging when plug into the charger for about 1 minute and than stops. Brought vehicle back into shop and tested batter, Battery tested good, battery tested 566cca out of 650, 11.70v @75 f. Performed visual inspection, OK. Performed health check on both toyota and tesla sides. On toyota side, found codes u0293, b14a8, b14a9 and b14aa. On Tesla ecu, found codes CHG_f078 charger internal problem detected on 07/07/2024 and 07/12/24 at 13:10 pm, time when attempted to charge vehicle in dealership, and CHG_f018 on 07/07/2024, issue is ongoing. Open up tas case # 241950075. As per Tas agent THOMAS, went back on log history for 1 month, no other codes found. Attached picture of log scan. Also disconnected connector D4 at onboard charger and checked B+ at pin 1 and ground at pin 7, 12v. Performed voltage drop @ pin 1, ok, .01v. same condition at ground pin 7. Measure PLT wire pin 5 of connector D4 to charger inlet pin 5 for high resistance, open or short circuit. ok. .2 oms from one end to the other and OL when measured from one end to chassi ground. Checked chassi ground from pin 7 of connector 01 to chassi, .2 ohms, ok. As per tas agent recommendation to replace the onboard charger if power and ground and no other codes were present.
 
As per Tas agent THOMAS, went back on log history for 1 month, no other codes found. Attached picture of log scan. Also disconnected connector D4 at onboard charger and checked B+ at pin 1 and ground at pin 7, 12v. Performed voltage drop @ pin 1, ok, .01v. same condition at ground pin 7. Measure PLT wire pin 5 of connector D4 to charger inlet pin 5 for high resistance, open or short circuit. ok. .2 oms from one end to the other and OL when measured from one end to chassi ground. Checked chassi ground from pin 7 of connector 01 to chassi, .2 ohms, ok.
They checked everything except the AC input fuses, sheesh.

If you want to follow that paragraph's narrative, here's a wiring diagram of the Tesla bits in the RAV4 EV that I put together a couple years ago from a Toyota subscription download; I made this diagram by removing all the Toyota stuff on it that didn't apply to the Tesla stuff, then adding better terminal descriptions.

https://asavage.dyndns.org/Toyota/R..._2014_Powertrain_Wiring_(Tesla_Parts)_02b.png

The left side of the OBC part only:

1721516486017.png

Connector D4 = "A" terminals
Connector o1 = "C" terminals


The tech checked that the OBC was getting 12v & ground, that there was insufficient voltage drop on those two lines to cause issues (ie no bad connections, so the OBC had plenty of 12v power), and then they checked the CP line ("PLT") from the charge port for open or short. They didn't check any of the other charge port lines; I guess THOMAS at TAS didn't suggest that.

CHG_f078 was the Alert I had when one of my OBC fuses failed last year.

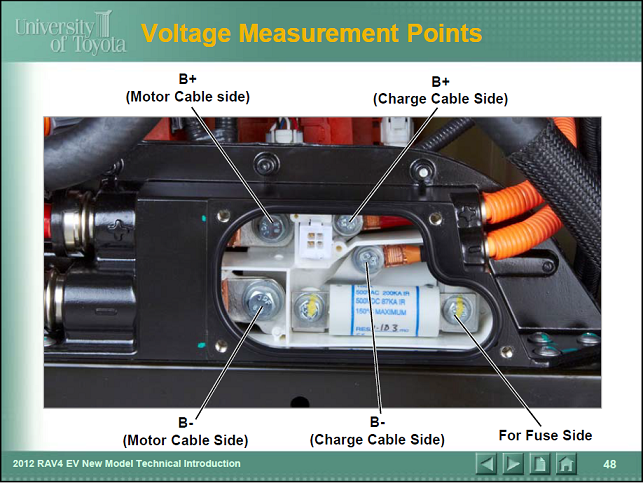
Do you want to fix or diagnose this yourself? First, use an ohmmeter to make these checks at the charge port; this checks the problematic OBC AC input fuses:

1721516730477.png

If those numbers are off by more than 5%, you likely have a failed fuse in the OBC. Usually just one, and you can often replace both fuses (because the originals do seem to "go bad", a rarity for fuses) and get the OBC back in service.

The Toyota way is to replace the OBC, and you probably received an estimate to do that; to Toyota, the OBC is a non-serviceable part, only to be replaced, never repaired. You can read the thread, starting here, to see how much effort is involved in obtaining (different, possibly more robust) fuses and replacing them yourself (or pay a shop to do it, if you can find one). If you DIY, it'll probably cost you under $300 which includes fuses, G48, underbody panel clips -- some always break or are missing -- and maybe a couple of special tools, which I show in my repair notes in that thread.

If you pay someone else, it's usually by-the-hour; I took ~12 man-hours in my driveway over two days, I'm old and work slowly but I also don't break things. I imagine a shop would give an estimate of around six hours plus of labor, and they usually aren't gentle; find their hourly rate and you have a good ballpark. You need an EV specialist, and while a Tesla indy would be best, anyone patient person will do. The key is patience, because if you start trying to move fast, plastic bits break, and you cannot buy new some of the parts that Tesla supplied, only from JYs, and that supply is drying up fast.

HTH
 
Last edited:
1.Quote from RAV4EV Repair Manual (Doc ID: RM000005CME009X)
CHG_f018 (Overcurrent Condition) Detection Condition
The electric vehicle charger input exceeds peak current threshold during charging.​
Trouble Area
Charger outside vehicle​
Wire harness or connector​
As I understand, "Hardware detected overcurrent in the high voltage positive or high voltage negative circuit* of the electric vehicle battery assembly" (During charging).
* https://alflash.com.ua/2019/to_rav4ev/hvlines.pdf

2. In the vast majority of cases**, the cause of the CHG_f078 code was a blown fuse in an Onboard Charger (fuse price is less than $100US).
** https://alflash.com.ua/2019/to_rav4ev/078a.png

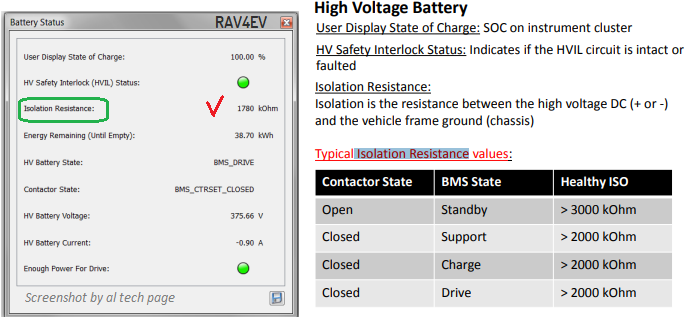
3. The numerical value of the insulation resistance parameter*** of your vehicle?
*** https://alflash.com.ua/2019/to_rav4ev/isol_resist.png
isol_resist.png
 
Last edited:
Update: it was OBC fuse; replaced and reassembled after many hours. Had to have Toyota replace the coolant; and 12 volt battery is now inop; I dropped in a new 12-volt battery; but ABS system is locked with warning light on; car will shift, but will not go into gear. Toyota is not interested, as car is stuck in parking lot and they can't/won't get it into bay. I powered it up several times, still stuck, and in board dash is in op; am seeing that there is a 4x power up clearance, will try that, but additional thoughts to get it unstuck? If not will have to tow home...
 
1.Current Tesla system fault codes?
2.Is READY mode available?
3.Is there a Check EV System message?

Note. ABS system flash codes can be read and erased without using scan tools (using a paper clip). And without leaving the cabin :) ...
 
Last edited:
Update: it was OBC fuse; replaced and reassembled after many hours.

I hope that you replaced both of them, as they have proven to be fragile. And you know how much labor is involved to change them.

Had to have Toyota replace the coolant; and 12 volt battery is now inop; I dropped in a new 12-volt battery;

IDK how they were able to run TPD to replace the coolant, with as many other things going on. Maybe they vacuum-evacuated the system instead of using their own service manual spec'd procedures.

but ABS system is locked with warning light on; car will shift, but will not go into gear.

in board dash is in op

These symptoms, coming after you have the OBC out, sound like a connector not fully seated, a harness pinched and damaged, etc. The IC always lights up, so if you that's non-op, that's a big clue. And that's on the Toyota side of things, so TPD won't show you any help for that one, nor for the ABS issue.
 
Thanks both of you; only working on it on the weekends...yes replaced both fuses; does not appear to be any Tesla codes, if I am running TPD correctly; TPD indicates firmware updates are current, as thought there could be mismatch after ODC out; but looks like this is a Toyota side issue, so headed there...will update...thanks for the paperclip tip!
 
Ran down the ABS and IC issues as blown fuses. So everything seems operable except: 1) in neutral, car does not allow rolling; have tried the transmission/engine override key several times; feels like it worked, but no change; 2) car goes into drive, makes the electrical sound, but no power to engine. Am thinking that I mis-connected in either junction box or DC-DC. Thoughts on easy way to test DC-DC connections to start to track down without electrocuting myself?
 
Back
Top