Troubleshooting Charger in Portland, OR

Toyota Rav4 EV Forum

Help Support Toyota Rav4 EV Forum:

This site may earn a commission from merchant affiliate links, including eBay, Amazon, and others.

danj.pdx

Member
Joined
Dec 8, 2023
Messages
7
Hello,

I'm new to the forum, so a quick introduction. We purchased our 2014 Rav4 off lease from a broker in the Bay Area back in 2017. It now as 96k miles. We adore the car as our around-town run about. It's spacious, basic and always ready for utility. There are at least 3 other Rav4 EVs we've seen running around Portland. One lives just 1/4 mile away, is the same color (silver) and sports aftermarket roof-racks like ours. I'm pretty into cars of many types/origins and DIY oriented, but have no experience with EVs.

In mid-December the car stopped charging and displayed a fault. I tested and found the 12v battery (the original) had failed. So I replaced the 12v battery. This didn't solve the problem.

It sounds like letting the 12v battery go south caused the OBC problems.

From there, I found this forum and started learning.

It's apparent that a failing 12v battery can cause issues with the Tesla powertrain and charging system. And the Tesla system is proprietary, and the OBDII/Toyota systems aren't very integrated into the Tesla system.

Reading the forum threads - we decided to dig in and replace the fuses in the OBC. Thanks to those who have documented this process. Going through that process it's apparent this wasn't designed for serviceability.

The fuses were indeed bad. With replaced fuses, the car sill would not charge, although the symptoms when attempting to charge had now changed.

I contacted Vladimir Leschtchenko for diagnostic assistance. We have tested the plug/cabling, and last week set up the remote diagnostics. His diagnostic work points to a fault in the OBC. I ordered a Tesla Model S Gen 1 OBC from Calimotive. That should arrive today. I plan to remove the charger control board from my current charger and swap that into the replacement Model S charger prior to installation.

I'll follow up once that's complete and report back on results.

These cars are inexpensive (so far at least), basic and have tons of interior room. Perfect for zooming around our little city. So in our case it is worth saving so we can run it as long as it will last.

If other Rav4 EV owners are in the PDX area and wants to share experience or borrow the diagnostic cable/router we have, just reach out.

Thanks to all who have documented their DIY adventures in the forum.

Dan.
 
Thanks for your feedback.
The screenshot shows the vehicle data at Charge mode after successful repair.
Dan - Author of the topic will probably tell us the details of the difficult path of this repair better than anyone else.
 

Attachments

  • charging.png
    charging.png
    226.6 KB · Views: 1
Last edited:
Dan,

It sounds like you have a similar issue as I did, where the fuse replacement did not fix the OBC. How much did the new OBC cost?
 
@jfletter - the replacement Onboard Charger was provided by Calimotive Auto Recycling It was $250 + shipping. I would recommend them. They buy accident damaged Teslas and perform charge/functional tests on the cars before dismantling.

I now have the original, but damaged OBC and will need to figure out what to do with it. If someone needs a spare for parts - knowing that we don't know what components are failed, - lmk.

Dan.
 
Recap of a successful and everything-but straightforward diagnosis and repair.

To start - kudos to Vladimir. His tenacity, logical and methodical process resulted in our beloved Rav4 coming back from the dead. It was running around in the rain today, quietly and efficiently doing its thing.

Our issues began in early December with a failing 12v battery. The display was showing the Service Immediately message and the car wouldn't charge. I replaced the 12v battery and expected that to solve the issue. Not so fast.

This lead me to the forum. I'm pretty comfortable wrenching on conventional cars and have fairly deep experience with different brands, nationalities and generations of cars from the '60s through '90s. From Lanica to Land Rover, Citroen to Civic.

It seemed most likely the OBC fuses had blown. So I purchased fuses and followed the procedure documented here. This was so much more difficult than it should be. As others have commented, the OBC design and fuse location were clearly not designed by someone thinking about service. It required a ridiculous amount of disassembly just to access fuses.

Once that was complete the car would attempt to charge for about 30 to 45 seconds, then stop.

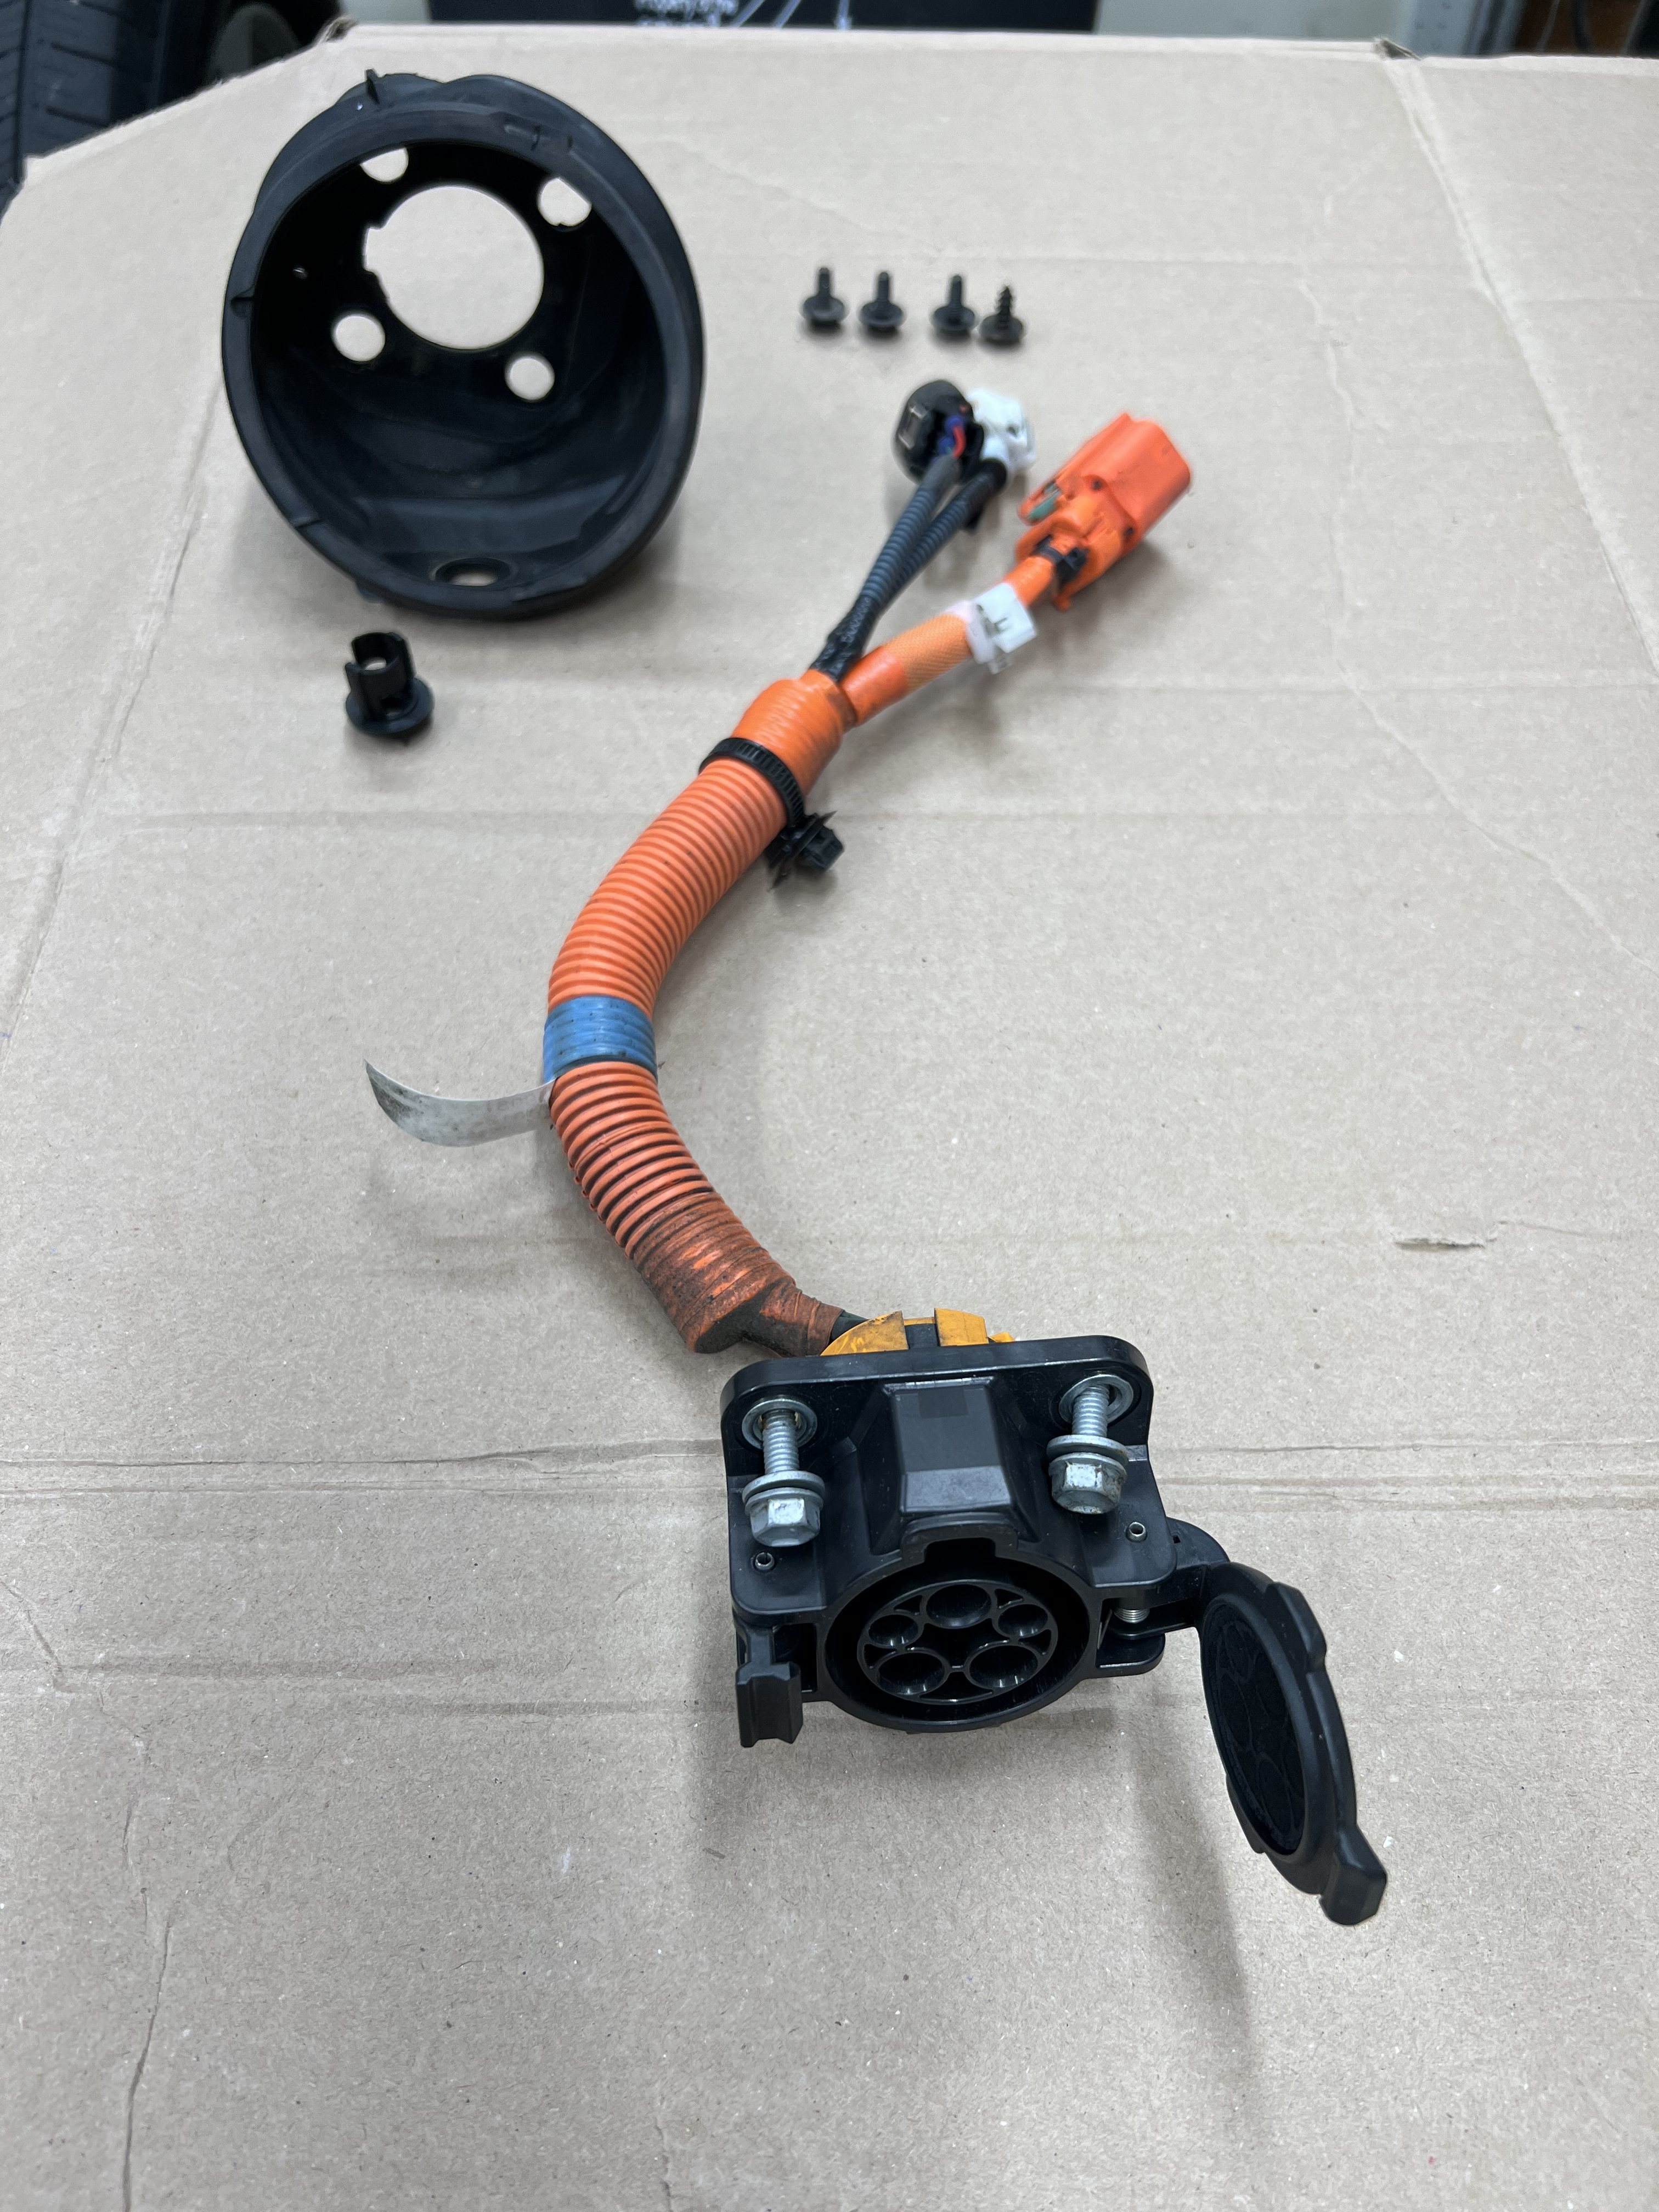
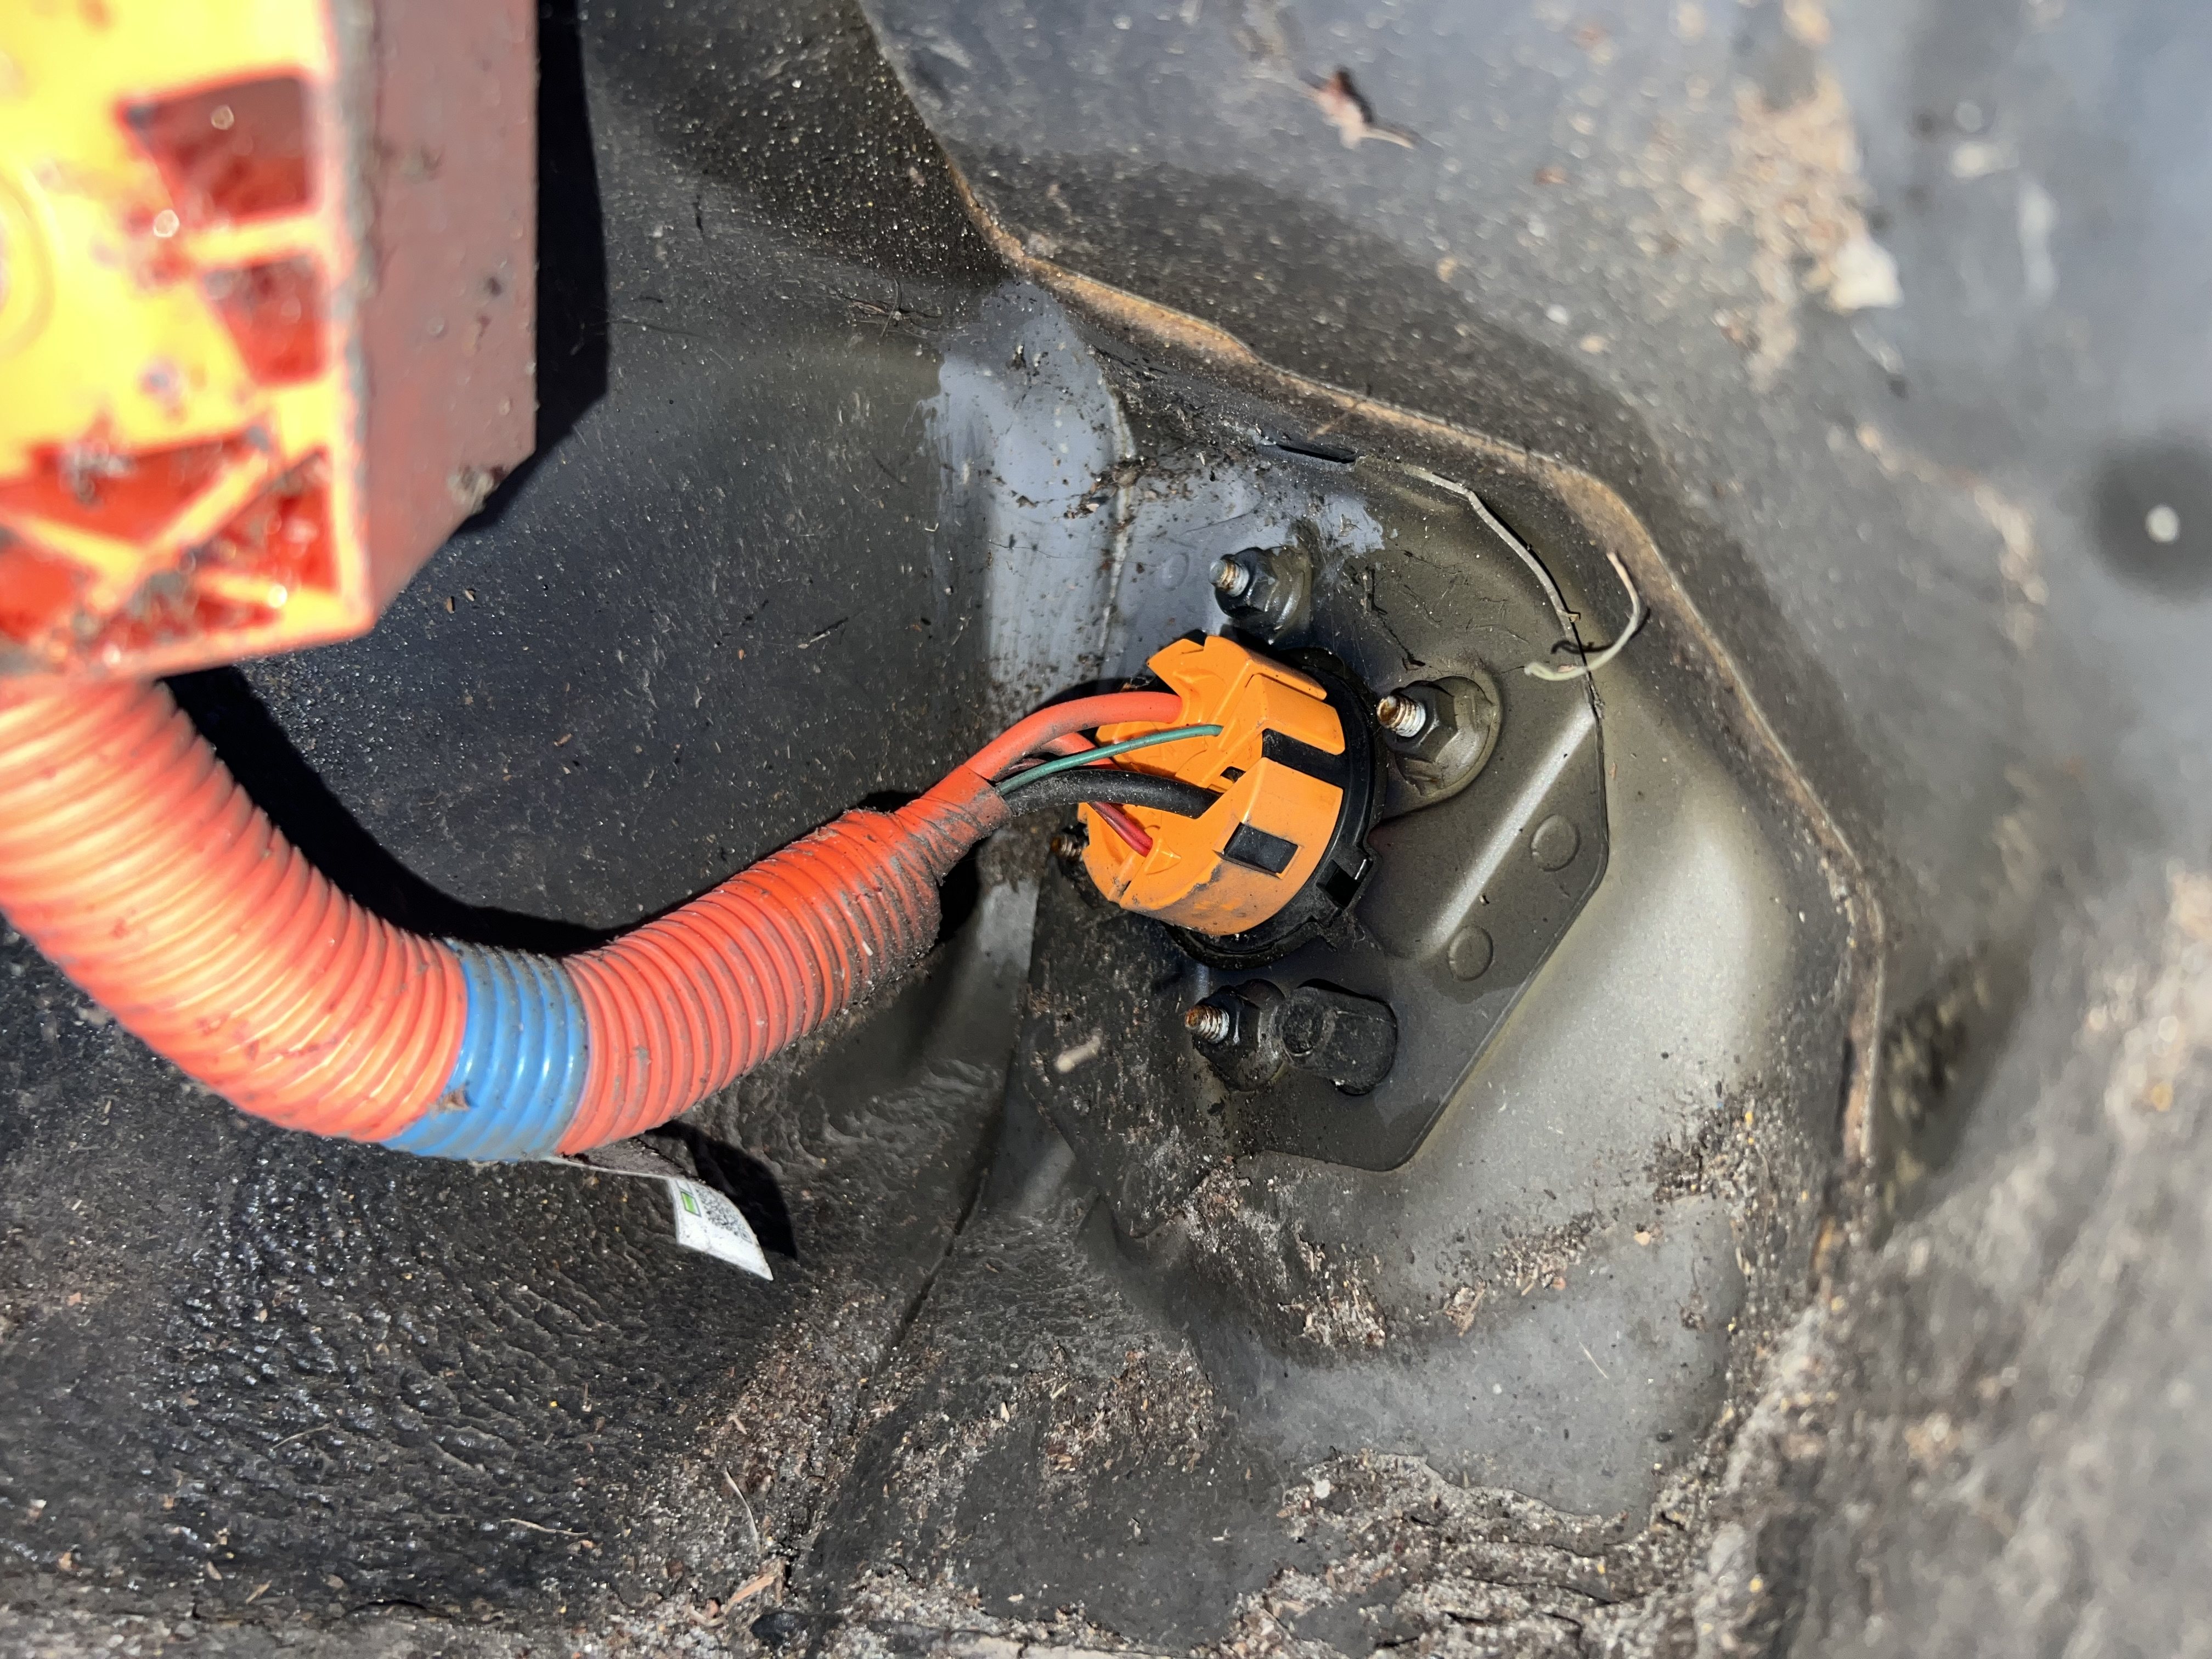
From here I contacted Vladimir for remote support. As a first step, he coached me through testing the charger plug in the rear of the car. From that testing and visual inspection found one of the high voltage pins looked had heat damage. I ordered new pins from Fast and Quiet

Damaged Pin
29-PXL-20231214-013529402.jpg


The pins I purchased are a touch longer than OEM. Also, it's necessary to crimp the heavy gauge wire securely to the pin. I purchased a specific crimper with hex shaped dyes for 8 to 1/0 gauge wire. The length of the crimped area on the bare wire is longer than the crimper is wide, so it took several crimps. Each crimp slightly deforms the base of the pin so it's important to make sure the pin remains straight when inserted into the plastic cradle. W/o the right crimper, the results aren't as sanitary as OEM. It does provide a very positive connection to the wire. Once reassembled, the plug works as it should.

Replacing the pin, and following Vladimir's procedure to verify the ground circuit and resistance values are correct was helpful to ensuring the cable/plug was not the cause for the failure.

The next step was remote diagnostics, I purchased the specified Mikrotik router, cable and OBD plug and rewired the cable/plug. It's important to pay close attention to the orientation of the OBD plug pin-outs and cable wires. I set it up incorrectly 2x before getting it right, even though there are only 4 wires used.

32-PXL-20240108-223449197.MP.jpg


If anyone out there wants to borrow our cables/router in order to conduct a remote diagnostic session, contact me. I'd be willing to box and ship to you for shipping cost. Hopefully I won't be using it again for a while.

Note about diagnostics. After 5+ years and over 60k of trouble-free driving, this issue changed how I look at our Rav4 EV. These are orphan cars at this point. I called around to some independent EV shops here in Portland to see if anyone would work on it. Not even here in the land of makers and DIY ethos did anyone want to take it on. With the existing fleet of Teslas, Leaves, Volts, etc getting on in years and miles, it will be interesting to see if independent EV-oriented shops become a thing.

Enthusiastic DIY owners contributing on forums like this, and experienced Rav4 EV professionals like Vladimir are the only resource to keeping these cars on the road. Without the ability to share information and diagnose systems - these cars will be worth scrap value the next time something fails.


The remote diagnostic phase of troubleshooting took place last week. Vladimir and his colleague configured the router and established a connection. The resulting report revealed an error code that indicated a problem with the OBC. The diagnostic software isn't as specific and helpful as traditional ICE car's OBD, which usually provides very specific codes that can help pinpoint hardware needing replacement. It's a bit frustrating because with these EVs. In a convention car, there may be a noise, leaking fluid, overheating, vibration, fluid consumption - any number of tactile clues that indicate what failed. With this, we just new the OBC wasn't functional.

I found and purchased Gen I Tesla Model S OBC from Calimotive Auto Recycling They had several in stock and shipped promptly.

Once received, I had already gone through the mechanically unsatisfying process of digging the OBC out from under all the other systems and brackets Yes it's faster the 2nd time, but still shouldn't be as inaccessible as it is.
33-PXL-20240107-005329462.jpg


At this point I could (and in retrospect) should have replaced the Control Board, located inside the top cover.
31-PXL-20240107-005810849.jpg


The Control Board is specifically associated with the specific OBC and the car's systems. So if you install a replacement OBC in your car, there are 2 options with the control board.

Either - Transfer your original Control Board to the replacement OBC, or have Vladimir reconfigure the Control Board that comes along with your replacement OBC.

I chose the latter, thinking I didn't want to mess with transferring a delicate looking circuit board. In retrospect, having Vladimir program the board worked, but it would have taken much less time to remove and transfer the board. To remove the board there's 3 screws on the left, unplug the connectors on top/bottom and gently disconnect the board from the multi-pin connectors on the right.

I also checked the fuses on the replacement board. They were ok, so I left them as-is.

From there, we reprogramed the control board. Then Vladimir went through several cycles of diagnostics with me sitting in the car, turning the ignition on/off, etc. There were a few surprises and hurdles (including a slightly weak 12v battery which had been sitting for a month at this point). He eventually reset things and after a final cycle of unplugging 12v power, the car was healed.

Vladimir was patient and persistent, and a total pleasure to collaborate with. I couldn't recommend him more highly. It would be something special if we could teleport him around the world to work his magic.

If anyone has questions, please lmk. We're beyond pleased to have this car back in service. It's not fun or flashy, but man it's perfect for what we ask it to do every day.

Thanks to everyone who contributes to this forum, and especially to Vladimir for his skills and patience.

Dan.


It is awesome that you got everything back up and running. It brings back memories of me and dfergensen digging out the inconveniently placed OBC too many times. I have a non-working OBC and all of the equipment that Dan mentioned, in the Sacramento area if anyone needs it, as well.
 
Not related to its installation in the RAV4 EV, but I started a Wiki on the Tesla GEN1 OBC (2012-2013) over at OpenInverter.org, documenting pinouts, connector part numbers, dimensions, etc. It's not currently a repair guide, its just a tech repository for this unit, and if anyone has something useful to contribute, you can add to it -- the beauty of a Wiki.

Eventually, it may include CAN data and signal levels (ie Drive Inhibit line levels/states). The GEN1 OBC is not popular for DIY EVs due to its bulk, weight, and relative unreliability compared to the more plentiful (and now better documented) GEN2 from 2014-on, but certainly we will be dealing with it for a long time.
 
Recap of a successful and everything-but straightforward diagnosis and repair.

To start - kudos to Vladimir. His tenacity, logical and methodical process resulted in our beloved Rav4 coming back from the dead. It was running around in the rain today, quietly and efficiently doing its thing.

Our issues began in early December with a failing 12v battery. The display was showing the Service Immediately message and the car wouldn't charge. I replaced the 12v battery and expected that to solve the issue. Not so fast.

This lead me to the forum. I'm pretty comfortable wrenching on conventional cars and have fairly deep experience with different brands, nationalities and generations of cars from the '60s through '90s. From Lanica to Land Rover, Citroen to Civic.

It seemed most likely the OBC fuses had blown. So I purchased fuses and followed the procedure documented here. This was so much more difficult than it should be. As others have commented, the OBC design and fuse location were clearly not designed by someone thinking about service. It required a ridiculous amount of disassembly just to access fuses.

Once that was complete the car would attempt to charge for about 30 to 45 seconds, then stop.

From here I contacted Vladimir for remote support. As a first step, he coached me through testing the charger plug in the rear of the car. From that testing and visual inspection found one of the high voltage pins looked had heat damage. I ordered new pins from Fast and Quiet

Damaged Pin
29-PXL-20231214-013529402.jpg


The pins I purchased are a touch longer than OEM. Also, it's necessary to crimp the heavy gauge wire securely to the pin. I purchased a specific crimper with hex shaped dyes for 8 to 1/0 gauge wire. The length of the crimped area on the bare wire is longer than the crimper is wide, so it took several crimps. Each crimp slightly deforms the base of the pin so it's important to make sure the pin remains straight when inserted into the plastic cradle. W/o the right crimper, the results aren't as sanitary as OEM. It does provide a very positive connection to the wire. Once reassembled, the plug works as it should.

Replacing the pin, and following Vladimir's procedure to verify the ground circuit and resistance values are correct was helpful to ensuring the cable/plug was not the cause for the failure.

The next step was remote diagnostics, I purchased the specified Mikrotik router, cable and OBD plug and rewired the cable/plug. It's important to pay close attention to the orientation of the OBD plug pin-outs and cable wires. I set it up incorrectly 2x before getting it right, even though there are only 4 wires used.

32-PXL-20240108-223449197.MP.jpg


If anyone out there wants to borrow our cables/router in order to conduct a remote diagnostic session, contact me. I'd be willing to box and ship to you for shipping cost. Hopefully I won't be using it again for a while.

Note about diagnostics. After 5+ years and over 60k of trouble-free driving, this issue changed how I look at our Rav4 EV. These are orphan cars at this point. I called around to some independent EV shops here in Portland to see if anyone would work on it. Not even here in the land of makers and DIY ethos did anyone want to take it on. With the existing fleet of Teslas, Leaves, Volts, etc getting on in years and miles, it will be interesting to see if independent EV-oriented shops become a thing.

Enthusiastic DIY owners contributing on forums like this, and experienced Rav4 EV professionals like Vladimir are the only resource to keeping these cars on the road. Without the ability to share information and diagnose systems - these cars will be worth scrap value the next time something fails.


The remote diagnostic phase of troubleshooting took place last week. Vladimir and his colleague configured the router and established a connection. The resulting report revealed an error code that indicated a problem with the OBC. The diagnostic software isn't as specific and helpful as traditional ICE car's OBD, which usually provides very specific codes that can help pinpoint hardware needing replacement. It's a bit frustrating because with these EVs. In a convention car, there may be a noise, leaking fluid, overheating, vibration, fluid consumption - any number of tactile clues that indicate what failed. With this, we just new the OBC wasn't functional.

I found and purchased Gen I Tesla Model S OBC from Calimotive Auto Recycling They had several in stock and shipped promptly.

Once received, I had already gone through the mechanically unsatisfying process of digging the OBC out from under all the other systems and brackets Yes it's faster the 2nd time, but still shouldn't be as inaccessible as it is.
33-PXL-20240107-005329462.jpg


At this point I could (and in retrospect) should have replaced the Control Board, located inside the top cover.
31-PXL-20240107-005810849.jpg


The Control Board is specifically associated with the specific OBC and the car's systems. So if you install a replacement OBC in your car, there are 2 options with the control board.

Either - Transfer your original Control Board to the replacement OBC, or have Vladimir reconfigure the Control Board that comes along with your replacement OBC.

I chose the latter, thinking I didn't want to mess with transferring a delicate looking circuit board. In retrospect, having Vladimir program the board worked, but it would have taken much less time to remove and transfer the board. To remove the board there's 3 screws on the left, unplug the connectors on top/bottom and gently disconnect the board from the multi-pin connectors on the right.

I also checked the fuses on the replacement board. They were ok, so I left them as-is.

From there, we reprogramed the control board. Then Vladimir went through several cycles of diagnostics with me sitting in the car, turning the ignition on/off, etc. There were a few surprises and hurdles (including a slightly weak 12v battery which had been sitting for a month at this point). He eventually reset things and after a final cycle of unplugging 12v power, the car was healed.

Vladimir was patient and persistent, and a total pleasure to collaborate with. I couldn't recommend him more highly. It would be something special if we could teleport him around the world to work his magic.

If anyone has questions, please lmk. We're beyond pleased to have this car back in service. It's not fun or flashy, but man it's perfect for what we ask it to do every day.

Thanks to everyone who contributes to this forum, and especially to Vladimir for his skills and patience.

Dan.


Dan, thank you for the detailed report and flattering review!

Under the communists in the evil empire there was a slogan “The case helping for those who are drowning is the work of the drowning people themselves”.
So now, many owners, unfortunately, have to independently fight for the lives of their four-wheeled friends.

This figure shows the fault codes after installing the donor charger and the result of its reprogramming.
 

Attachments

  • relash.png
    relash.png
    305 KB · Views: 0
Dan, Since you have put so much effort into repairing your vehicle, I recommend doing this simple check and show a photo of its results.
For example,
https://alflash.com.ua/2019/to_rav4ev/speed_sensor.jpg

Hi Vladimir - yes I did perform this check and it's dry so far. Also, there's not been a perceptible difference in engine/bearing noise in the time we've owned the car. At some point I assume we will need to remove the motor and replace the bearings.
 
Dateline January 10th, 2024. New development? Perhaps

Last night while charging, I found our Juicebox Pro 40 was beeping and displaying a 5 beep pattern error. It is a late 2017 model, and that error code indicates a relay is not closing/opening. I switched off the power to that circuit.

This morning I spoke with Juicebox support. They recommended (not kidding) giving the box a 'love tap' (their words, not mine) on the right side, then reconnecting the power. This worked and cleared the code. They said at some point that problem will return. The unit is out of warrantee but they sent me a $100 credit towards a new one.

Could this have been what caused my car's OBC to blow fuses and become inoperable? I had assumed the OBC issue was related to our failing 12v battery.

Next - should we buy another Juicebox - about $350 including the credit - or do you recommend a different brand?

Suggestions?

Many thanks,
Dan.
 
I own three OpenEVSEs and I like them, but they're not the cheapest option.
If it was my Juicebox, I'd find the part number of the sticking contactor and just R&R the contactor. Or even install a generic. Just a couple of quick examples:

https://store.openevse.com/collections/all-products/products/50a-dpst-relay-set
https://store.openevse.com/collecti...d-c240c-40a-contactor-208-240vac-coil-50-60hz
A lot of "50A" DC contactors can't really handle a constant 40A draw, unsurprisingly, but the better brand-name ones have a better shot at it.

Either of those would likely resuscitate your Juicebox, I'm guessing. You replaced the AC input fuses on your OBC, you can definitely replace a sticking DC contactor in your EVSE.

[later]
Edited to remove references to "DC". See how that's done, Vlad?
 
Last edited:
Hi Al,

Thanks for the suggestions. This is a DIY-safe thing to do? The Juicebox is on the wall inside my garage/shop. We generally park the car outside and charge outside.

I'm super (probably overly) confident R&R ing things. But I'm not an EE or electrician. If this is as simple as removing the cover and replacing a component, and that's not inherently unsafe - like replacing the fuses or changing breakers in a panel - then sure I can do that.

What is it that would cause a DC contactor to fail, or become sticky (if that's the right term)?

Thanks a bunch.
 
When you make (and esp. break) a high-current DC circuit, the current "wants" to continue to flow, and an arc is created (and, often, the voltage on the circuit will briefly rise to maintain the arc's high resistance). While is is also true of AC, with AC you have a voltage zero-crossing event 50 or 60 times per second, and the arc is more easily quenched (or dies) during a zero voltage time.

So, while AC contactors can withstand say X number of mechanical openings/closings, put a DC current across the same contacts and same current, and the contacts will wear very quickly due to the sustained, repeated arcing. Spec sheets for HVDC contactors often derate their rated number of cycles by 90% for under-load conditions. This is why good DC circuit design for circuits that contain mechanical contactor always attempt to reduce current flow prior to closing or opening the mechanical contacts.

Arcing can cause wear, but it can also heat up the contact material such that the contacts weld closed. All EVs do a "weld check" on the contactors as part of their start-up or charge-end cycle, measuring for voltage at both sides of the contactor, making sure that the contacts are actually in an open state. If the contactor is supposed to be open, but HV is measured on both sides, it fails the weld check and will not allow further operation. This is still "safe" in that the other HVDC contactor in the circuit is assumed to not fail closed at the same time, so there's no low-resistance path from, say, the vehicle chassis to the other side of the HV circuit.

Unless Juicebox used a PCB-mount contactor -- unusual for a 50A circuit -- then the contactor will likely be a DPST unit with screw terminals for ring terminal wires, plus two screws to hold the contactor to the chassis: easy to replace with hand tools. Take a picture of the terminals and wires layout before removing them, and you should have no issues.

The OpenEVSE EVSEs can be purchased as a DIY kit, or assembled and tested, and you can read the open-source assembly instructions if you want to get a feel for this kind of thing, but I wouldn't bother unless you're interested.

I'm sure there's a YT video on replacing a Juicebox contactor; isn't there one for everything?
[later]
iFixit has a guide:
https://www.ifixit.com/Guide/JuiceBox+EVSE+Relay+Replacement+(UL-front+LEDs+version)/154411
---

Ooops. On an L2 EVSE, we are talking about AC, not DC. While the above may be informative, it doesn't apply to your Juicebox. But AC contacts do still weld closed, and I assume that the downstream voltage check failed on yours. A "love tap" will jar it loose, just as a failed electric in-tank fuel pump on a modern ICE can sometimes be jolted back to life, briefly, by whacking the bottom of the fuel tank with a rubber mallet. Can't tell you how many cars that came in on a tow truck I was able to drive from the lot into the shop using that trick. Only works a couple of times, as would your "love tap" fix of a stuck relay in your EVSE: eventually, the contacts will fail to reopen with a tap, or will fail to close properly, leading to overheating of the relay/smoke. Good circuit design catches that.
 
Last edited:
Recap of a successful and everything-but straightforward diagnosis and repair.

To start - kudos to Vladimir. His tenacity, logical and methodical process resulted in our beloved Rav4 coming back from the dead. It was running around in the rain today, quietly and efficiently doing its thing.

Our issues began in early December with a failing 12v battery. The display was showing the Service Immediately message and the car wouldn't charge. I replaced the 12v battery and expected that to solve the issue. Not so fast.

This lead me to the forum. I'm pretty comfortable wrenching on conventional cars and have fairly deep experience with different brands, nationalities and generations of cars from the '60s through '90s. From Lanica to Land Rover, Citroen to Civic.

It seemed most likely the OBC fuses had blown. So I purchased fuses and followed the procedure documented here. This was so much more difficult than it should be. As others have commented, the OBC design and fuse location were clearly not designed by someone thinking about service. It required a ridiculous amount of disassembly just to access fuses.

Once that was complete the car would attempt to charge for about 30 to 45 seconds, then stop.

From here I contacted Vladimir for remote support. As a first step, he coached me through testing the charger plug in the rear of the car. From that testing and visual inspection found one of the high voltage pins looked had heat damage. I ordered new pins from Fast and Quiet

Damaged Pin
29-PXL-20231214-013529402.jpg


The pins I purchased are a touch longer than OEM. Also, it's necessary to crimp the heavy gauge wire securely to the pin. I purchased a specific crimper with hex shaped dyes for 8 to 1/0 gauge wire. The length of the crimped area on the bare wire is longer than the crimper is wide, so it took several crimps. Each crimp slightly deforms the base of the pin so it's important to make sure the pin remains straight when inserted into the plastic cradle. W/o the right crimper, the results aren't as sanitary as OEM. It does provide a very positive connection to the wire. Once reassembled, the plug works as it should.

Replacing the pin, and following Vladimir's procedure to verify the ground circuit and resistance values are correct was helpful to ensuring the cable/plug was not the cause for the failure.

The next step was remote diagnostics, I purchased the specified Mikrotik router, cable and OBD plug and rewired the cable/plug. It's important to pay close attention to the orientation of the OBD plug pin-outs and cable wires. I set it up incorrectly 2x before getting it right, even though there are only 4 wires used.

32-PXL-20240108-223449197.MP.jpg


If anyone out there wants to borrow our cables/router in order to conduct a remote diagnostic session, contact me. I'd be willing to box and ship to you for shipping cost. Hopefully I won't be using it again for a while.

Note about diagnostics. After 5+ years and over 60k of trouble-free driving, this issue changed how I look at our Rav4 EV. These are orphan cars at this point. I called around to some independent EV shops here in Portland to see if anyone would work on it. Not even here in the land of makers and DIY ethos did anyone want to take it on. With the existing fleet of Teslas, Leaves, Volts, etc getting on in years and miles, it will be interesting to see if independent EV-oriented shops become a thing.

Enthusiastic DIY owners contributing on forums like this, and experienced Rav4 EV professionals like Vladimir are the only resource to keeping these cars on the road. Without the ability to share information and diagnose systems - these cars will be worth scrap value the next time something fails.


The remote diagnostic phase of troubleshooting took place last week. Vladimir and his colleague configured the router and established a connection. The resulting report revealed an error code that indicated a problem with the OBC. The diagnostic software isn't as specific and helpful as traditional ICE car's OBD, which usually provides very specific codes that can help pinpoint hardware needing replacement. It's a bit frustrating because with these EVs. In a convention car, there may be a noise, leaking fluid, overheating, vibration, fluid consumption - any number of tactile clues that indicate what failed. With this, we just new the OBC wasn't functional.

I found and purchased Gen I Tesla Model S OBC from Calimotive Auto Recycling They had several in stock and shipped promptly.

Once received, I had already gone through the mechanically unsatisfying process of digging the OBC out from under all the other systems and brackets Yes it's faster the 2nd time, but still shouldn't be as inaccessible as it is.
33-PXL-20240107-005329462.jpg


At this point I could (and in retrospect) should have replaced the Control Board, located inside the top cover.
31-PXL-20240107-005810849.jpg


The Control Board is specifically associated with the specific OBC and the car's systems. So if you install a replacement OBC in your car, there are 2 options with the control board.

Either - Transfer your original Control Board to the replacement OBC, or have Vladimir reconfigure the Control Board that comes along with your replacement OBC.

I chose the latter, thinking I didn't want to mess with transferring a delicate looking circuit board. In retrospect, having Vladimir program the board worked, but it would have taken much less time to remove and transfer the board. To remove the board there's 3 screws on the left, unplug the connectors on top/bottom and gently disconnect the board from the multi-pin connectors on the right.

I also checked the fuses on the replacement board. They were ok, so I left them as-is.

From there, we reprogramed the control board. Then Vladimir went through several cycles of diagnostics with me sitting in the car, turning the ignition on/off, etc. There were a few surprises and hurdles (including a slightly weak 12v battery which had been sitting for a month at this point). He eventually reset things and after a final cycle of unplugging 12v power, the car was healed.

Vladimir was patient and persistent, and a total pleasure to collaborate with. I couldn't recommend him more highly. It would be something special if we could teleport him around the world to work his magic.

If anyone has questions, please lmk. We're beyond pleased to have this car back in service. It's not fun or flashy, but man it's perfect for what we ask it to do every day.

Thanks to everyone who contributes to this forum, and especially to Vladimir for his skills and patience.

Dan.


p.s.s. IMHO
On the issue of onboard charger failures.
As the internal Charger RAV4EV is known, it can handle input AC up to 40A RMS.
And even if the external charger generates a 50 A pilot-signal the RAV4EV charger will only take 40A (yested in practice).
The native external charger (aka Toyota Name CCID) that comes with the car has a pilot signal of only 12-13 A.
My practice shows a correlation between the frequency of failure of the internal charger and the frequency of using high-ampere external charges (up to 40A). I believe that Tesla engineers overestimated the capabilities of this onboard charger and its reliability is much worse with long-term use of 40A external charges, since 40 amperes is the permissible limit. I would venture to recommend using external chargers up to AC 30÷35 amperes.
 
I own several JuiceBox units, and generally have had good reliability with them. However I have replaced a stuck relay in one of the older (metal) ones, and found a damaged PCB-mounted relay in one of the newer (plastic) models from poorly tightened connections. A sticking relay is unlikely to have caused your internal OBC fuses to blow.

It's pretty easy to open up your JuiceBox and see what's going on. If it's the older style with an exposed frame contactor, a replacement can be ordered from Amazon for $16, search for 'JQX-62F-2C'. If it's an enclosed relay mounted on a small PCB, there's a guy (former JuiceBox engineer?) that sells replacement parts on eBay.
 
Back
Top