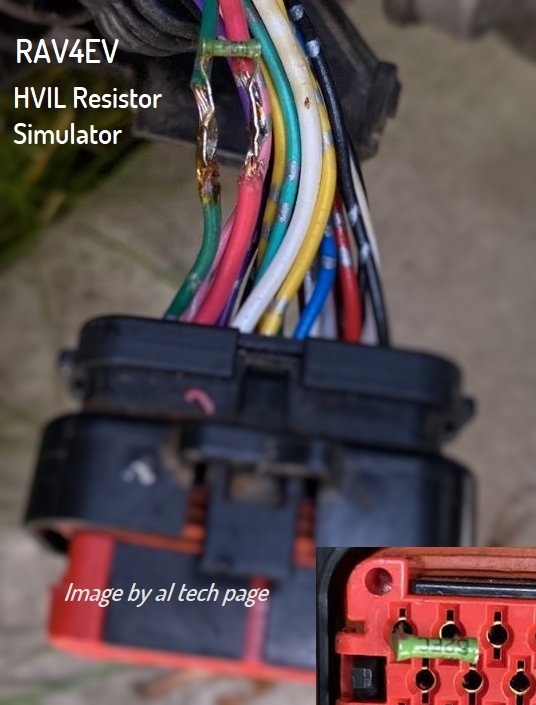
I agree, they look in reasonable condition, no bent pins.
It's pretty easy to slice stuff when taking the glued-on-cover off; did you take any pics with the cover off?
Electrified Garage mentions that the HVIL leads for the three connectors above are the ones that are esp. easy to damage when breaking the sealant (link is to the pertinent part of the vid):
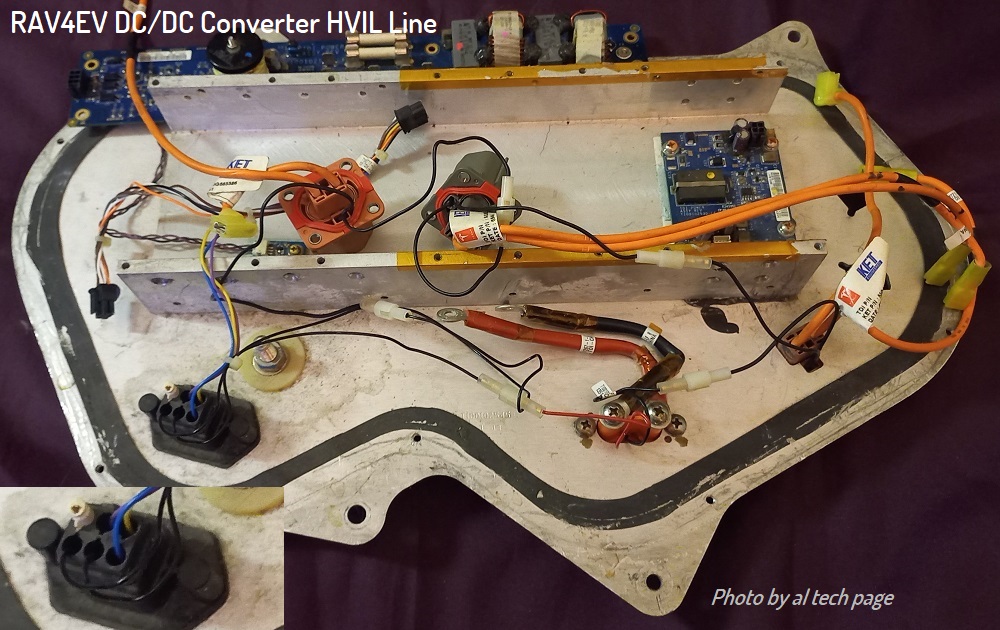
If any of the below eight wires, circled in blue, are damaged, that could cause that problem:
View attachment 862
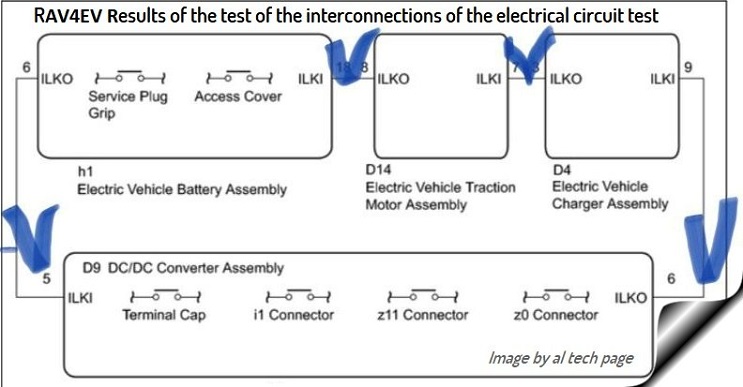
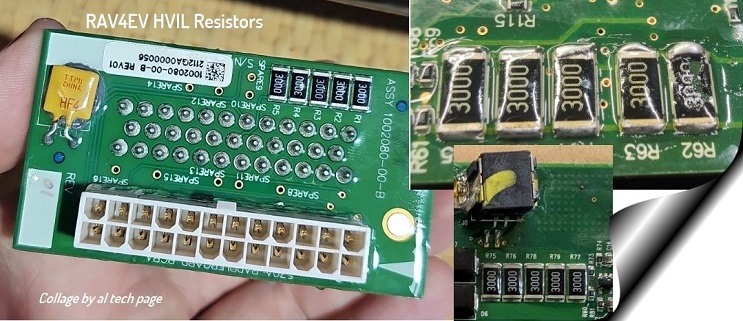
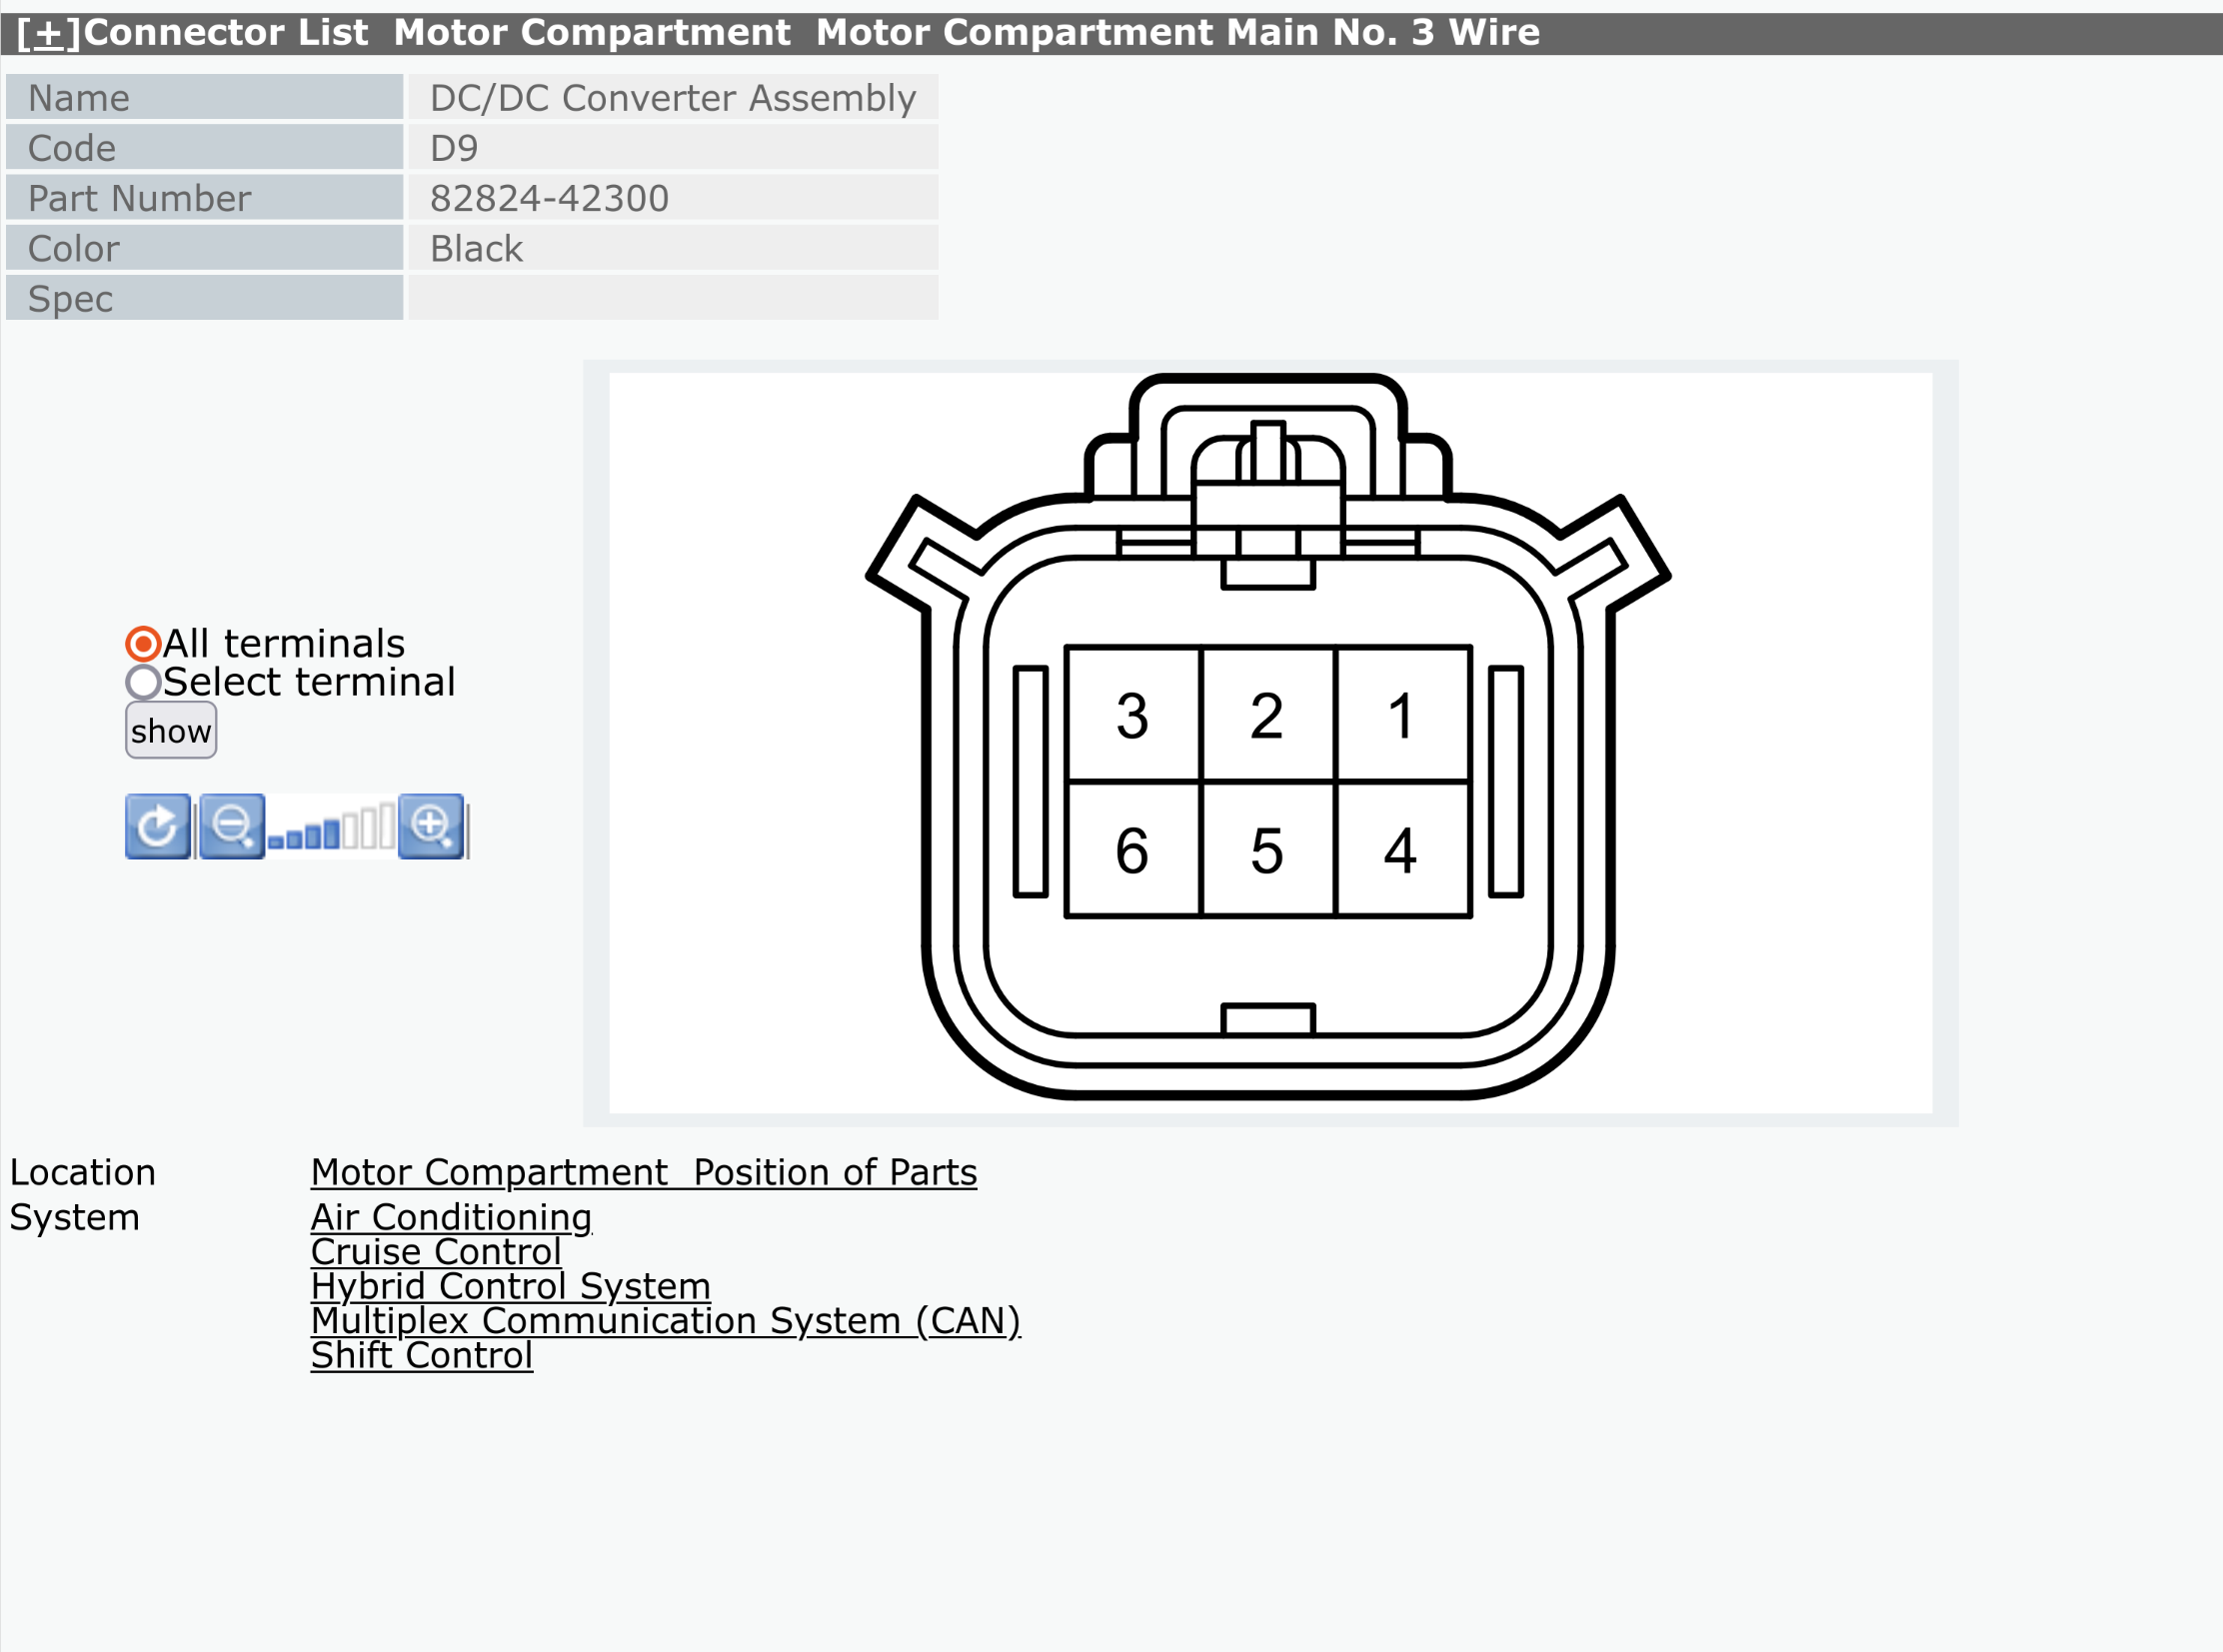
It looks as if there's only one 60 ohm resistor inside the DC-DC that covers the entire loop. This is a Tesla diagram, but the DC-DC is the same part on the RAV4 EV:
View attachment 863
That being the case, maybe you could probe (with a suitable probe: a clip lead on a sewing needle is a favorite, if you don't have anything fancier around) those HVIL sockets in the DC-DC. Off the top of my head . . .
I have to recommend doing the below with the Service Disconnect removed, as that makes the car "safe" from HVDC ("safe" being relative). And you're theoretically probing a device with a 200A 12v DC fuse, so maybe disconnect the 12v battery, too. I have to say this.
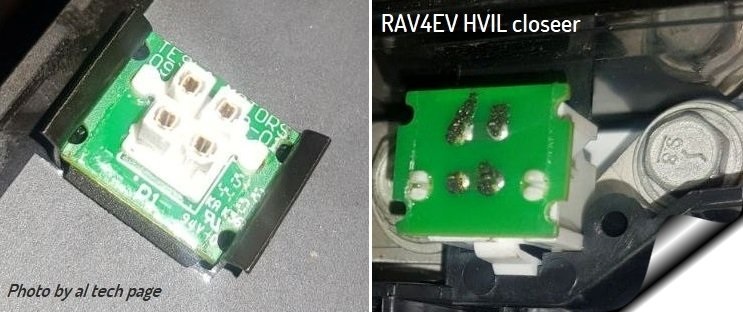
With the plastic cover installed over the terminal block, plug in all but but one of the auxiliary connectors, and probe the socket of the one you didn't plug in. It should show either ~0 ohms across the HVIL sockets, or 60 ohms, nothing in-between. If that passes, plug in that connector, and disconnect the next one, and repeat.
If you probe any two and get open, or something other than 60 ohms/0 ohms, you'll need to open it back up.


")